Blog

  • 6 Things You Must Clarify Before Buying a Semi-Trailer: A Global Procurement Decision Framework

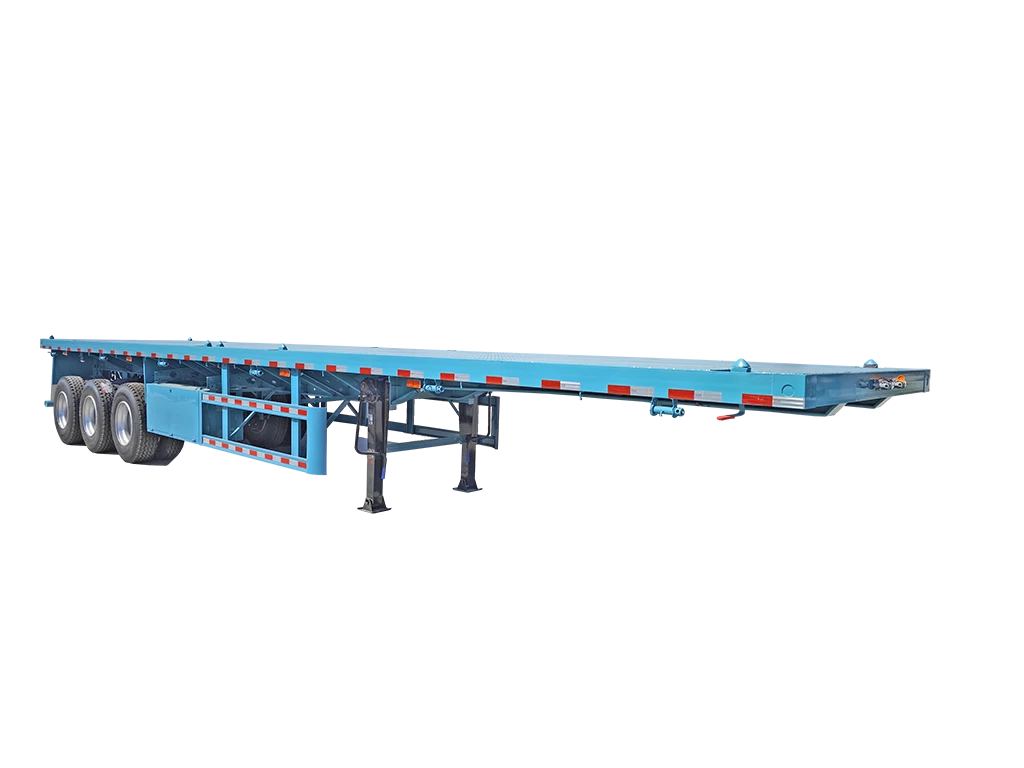
    Flatbed, step-deck, and lowbed semi-trailer chassis types compared for fleet procurement
    The correct semi-trailer specification follows the cargo, legal payload, route, regulations, lifecycle cost, and resale plan.

    Industry Knowledge & Buying Guides · Published: August 5, 2026 · Updated: August 5, 2026 · Word count: 2506 · Reading time: 14 minutes

    6 Things You Must Clarify Before Buying a Semi-Trailer: A Global Procurement Decision Framework

    Jason, Lead Engineer at Kales Vehicle

    Reviewed by Jason
    Lead Engineer, Kales Vehicle

    A profitable semi-trailer purchase starts before price comparison. Define the cargo, legal payload, real road conditions, registration rules, five-year total cost, and resale plan in that order. These six decisions turn a generic quotation into a trailer specification that can be registered, maintained, loaded legally, and operated profitably.

    Quick Answer: The Six-Factor Decision Chain

    1. Application defines the trailer category and cargo-control system.
    2. Payload defines the legal load target, structure, axle group, and tare-weight priorities.
    3. Road conditions define suspension, brakes, tires, ground clearance, and fatigue resistance.
    4. Regulations set the non-negotiable dimensional, mass, braking, lighting, and approval envelope.
    5. TCO budget narrows the specification by landed cost, fuel, maintenance, downtime, and support.
    6. Residual value determines which brands, documentation, and common specifications protect the exit price.

    The Six-Factor Procurement Sequence

    1. Application

    What cargo and loading method?

    2. Payload

    What legal net load and axle distribution?

    3. Road Conditions

    What must the running gear survive?

    4. Regulations

    What approval envelope applies?

    5. TCO Budget

    What is the landed five-year cost?

    6. Residual Value

    How will the asset exit the fleet?

    Factor 1: Application – Start With “What Am I Hauling?”

    Cargo Dictates the Engineering

    A semi-trailer is a purpose-built tool, not a generic commodity. Leading with “How much for a 13-meter flatbed?” starts at the wrong end. Begin with the cargo’s physical profile, density, center of gravity, restraint needs, and loading or unloading method. Buyers still choosing between open-deck formats should compare the flatbed, step-deck, and lowbed selection guide before requesting drawings.

    Operating scenario Typical cargo Recommended trailer type Primary engineering focus
    General freight and logistics Palletized goods, FMCG Curtain-sider or enclosed box Fast side loading, weather protection, and cargo security
    Agricultural and bulk goods Grain, timber, bagged cargo Side-wall or stake trailer Ventilation, removable sideboards, ties, and winch points
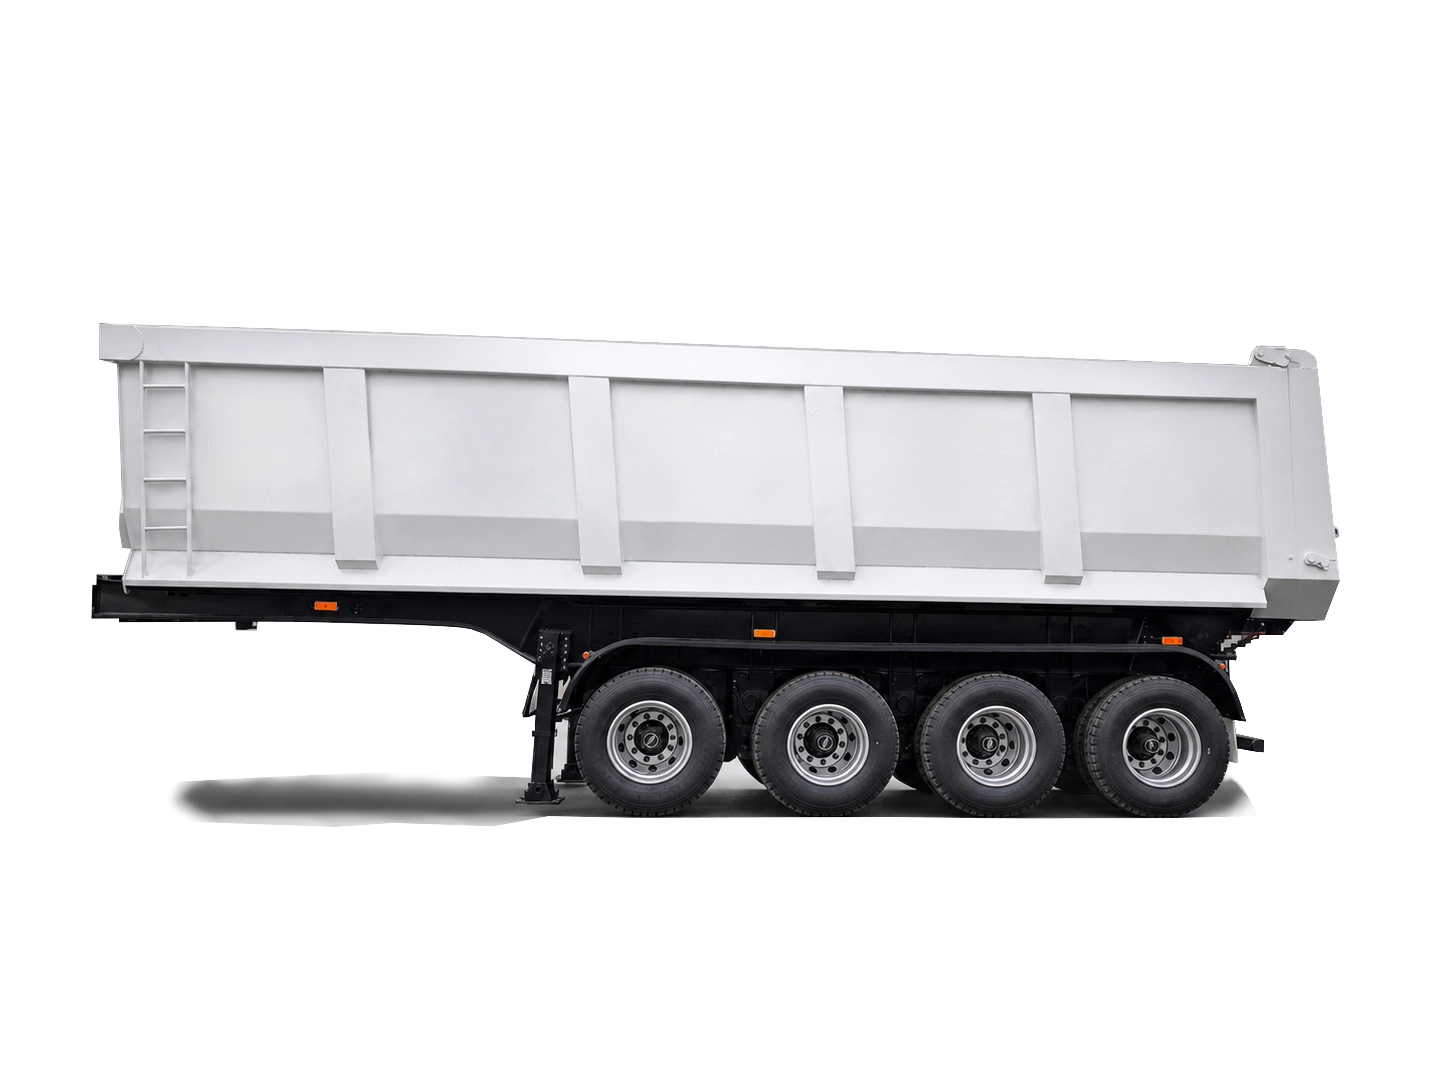
    Mining and construction Ore, aggregates, sand, gravel Rear- or side-tipper Wear-resistant body material, cylinder stability, and rollover control
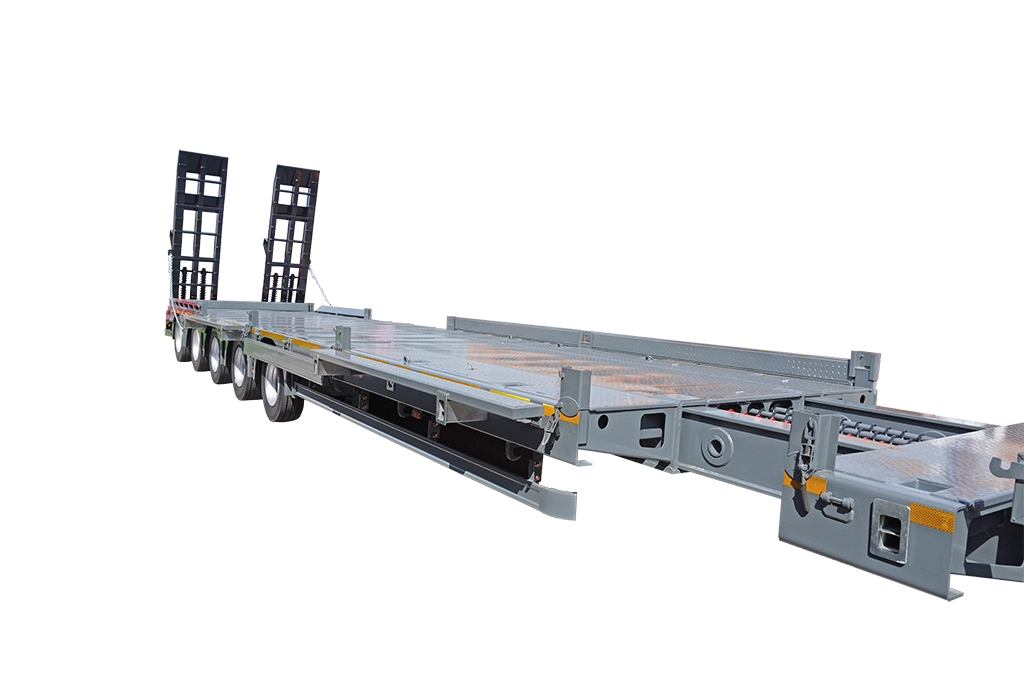
    Heavy machinery and projects Excavators, transformers, coils Low-loader or extendable flatbed Low center of gravity, ramp angle, concentrated load, and gooseneck strength
    Intermodal freight 20 ft, 40 ft, or 45 ft ISO containers Container skeletal or flatbed Twist-lock positions, durability, and tare optimization
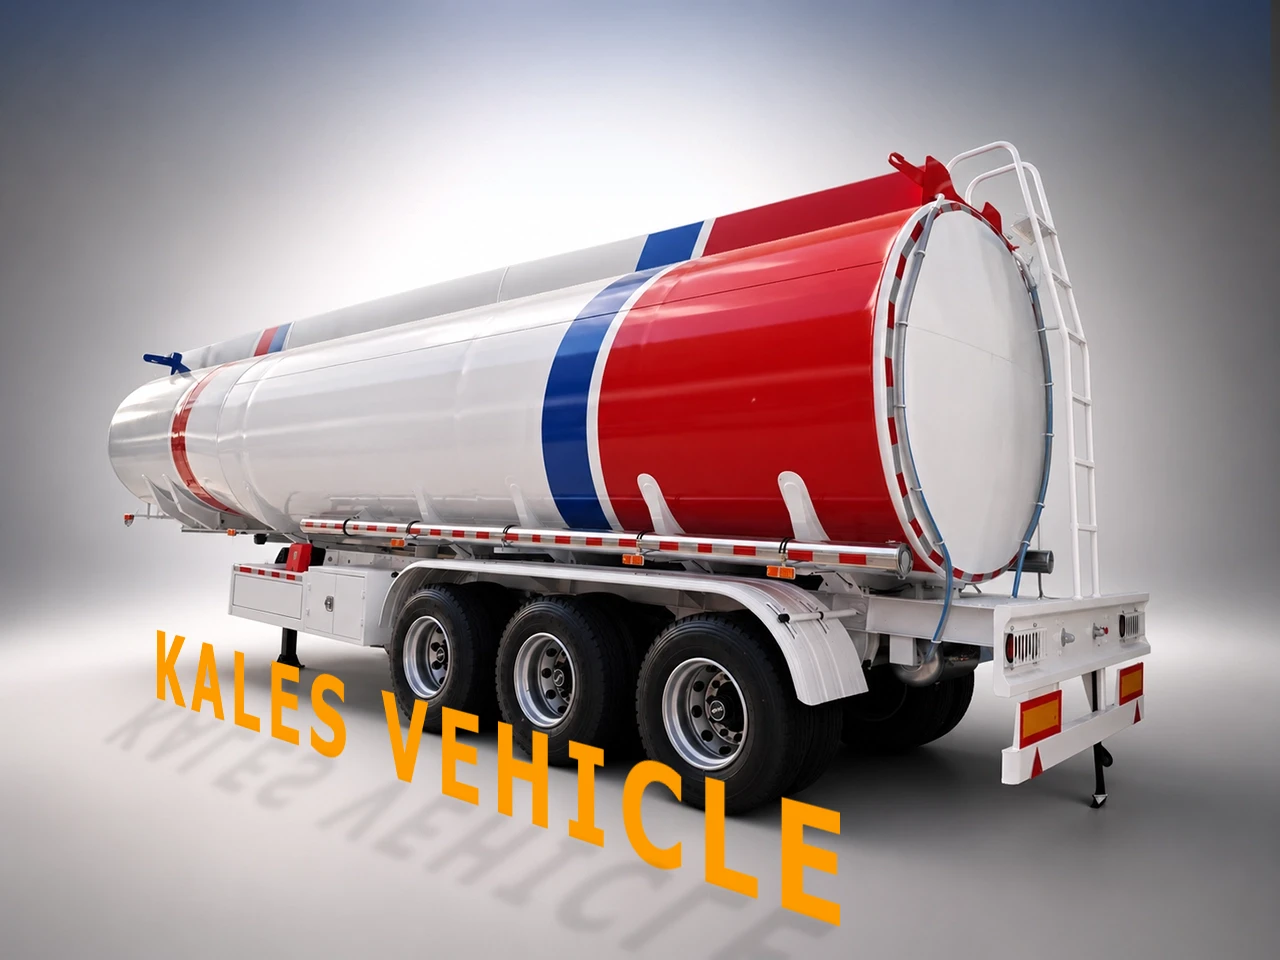
    Liquid or dry bulk Fuel, cement, chemicals, oils Code-compliant tanker or bulker Baffles, pressure rating, cargo compatibility, and discharge speed

    Application Questions Before Finalizing the Specification

    • Is the freight contract fixed or spot-market? A long-term contract can justify a specialized tipper or tanker. Spot-market fleets usually need a more versatile architecture.
    • How is the cargo loaded and unloaded? Forklift loading makes side aperture, floor capacity, and concentrated forklift axle load critical. Crane, ramp, tipping, pumping, and pneumatic discharge each create different requirements.
    • What changes on the return trip? Empty running, backhaul cargo, washout, contamination, and loading-site access can change the best body type.

    Factor 2: Payload – Legal Limit vs. Structural Rating

    Do Not Confuse Design Rating With Legal Payload

    A trailer’s structural rating, such as a “50-ton design,” is not the payload a fleet may legally carry. Revenue payload is limited by the complete combination, national and route rules, axle-group limits, spacing, tractor tare, trailer tare, fuel, driver, and load distribution.

    Legal payload = permitted gross combination mass – tractor tare – trailer tare – fuel, driver, and operating equipment

    Target market Indicative planning range Authority or framework Critical verification
    Australia About 42.5 t for common general-access combinations; higher productivity schemes can exceed 62.5 t NHVR, ADR, PBS, and ROVER Axle-group spacing, access class, route approval, and applicable PBS design
    Kazakhstan and Kyrgyzstan Often around 40 to 44 t for standard international combinations EAEU TR CU 018/2011 plus national road rules Type approval, axle limits, route restrictions, and expanding weigh-in-motion enforcement
    Uzbekistan Confirm the current national combination and axle limits National vehicle approval and road authorities Do not assume EAEU type approval applies; verify Uzbek registration and transit requirements separately
    West and East Africa Common planning ranges vary roughly from 40 to 56 t National rules with EAC, ECOWAS, or COMESA regional context Country-specific axle groups, bridge formulas, dimensions, and transit-corridor enforcement
    South America Common combinations vary roughly from 45 to 57 t National authorities such as Chile CONASET and Brazil CONTRAN Country, route, combination, gradient, stability, and permit requirements

    These figures are procurement-planning references, not legal approvals. Confirm the current registration-country and route rules in writing before production.

    Factor 3: Road Conditions – Let the Route Dictate the Spec Sheet

    A payload specification tells you what a trailer can carry. The route tells you what the chassis, suspension, brakes, wheel ends, and body must survive.

    Terrain profile Specification priorities Main procurement risk
    Sealed highways Low tare, aerodynamics, air suspension, low-rolling-resistance tires, and compatible disc brakes/EBS where supported Paying for rough-road weight that reduces payload and fuel efficiency
    Corrugated or unpaved mining roads Mechanical or bogie suspension, reinforced beams and suspension mounts, drum-brake serviceability, sealed wheel ends, and ground clearance Applying a minimalist highway structure to repeated shock and twist loads
    High-altitude and mountain routes High-capacity braking, EBS and retarder compatibility, low center of gravity, anti-roll control, and suitable axle track Brake fade, rollover exposure, and insufficient thermal capacity

    Suspension must follow the load spectrum, road roughness, cargo sensitivity, service network, and rollover risk. Use the leaf spring versus air suspension guide to compare repairability, ride quality, axle load sharing, and five-year cost.

    Brakes and tires must also be specified as part of the tractor-trailer system. Compare ABS, EBS, RSS, and AEBS in the semi-trailer braking systems guide, then match size, construction, wheels, inflation practice, and route heat using the semi-trailer tire and wheel selection guide.

    Factor 4: Regulations – Define the Non-Negotiable Boundaries

    Cross-border procurement requires more than a structurally capable trailer. Non-compliance can prevent registration, restrict route access, invalidate insurance assumptions, or require expensive modifications after arrival.

    Australia: ADR, ROVER, NHVR, and PBS

    • Confirm every applicable Australian Design Rule, including the current braking, lighting, coupling, underrun, dimensional, and plate requirements.
    • Confirm the vehicle and approval pathway in the Department of Infrastructure’s ROVER system before shipment.
    • For Performance Based Standards operation, confirm the approved design, vehicle network, mass conditions, and operating route with the NHVR.

    Central Asia: Separate EAEU and National Requirements

    • Kazakhstan and Kyrgyzstan participate in the EAEU framework; confirm the applicable TR CU 018/2011 vehicle approval and national registration requirements.
    • Uzbekistan is not an EAEU member. Confirm Uzbek national type approval, axle, dimensional, customs, and transit requirements independently.
    • Account for weigh-in-motion expansion and cross-border differences along the complete corridor.

    Africa: National Enforcement Within Regional Corridors

    • Use EAC, ECOWAS, COMESA, and SADC frameworks as regional context, then confirm national axle, dimension, registration, and roadworthiness rules.
    • Verify tridem axle limits and spacing rather than assuming one 24-ton rule applies across every country.
    • Match invoices, certificates, and import documents to the correct vehicle description and HS classification.

    For country and corridor detail, use the Africa semi-trailer buying guide.

    South America: National Rules Control

    • Confirm each country’s combination mass, axle load, dimensions, braking, lighting, reflective marking, coupling, and route restrictions.
    • Chile CONASET and Brazil CONTRAN are examples of national authorities; Mercosur context does not replace national registration approval.
    • Mountain routes require a separate review of grade, brake energy, stability, and dangerous-goods controls where applicable.

    Factor 5: Budget – Compare Five-Year Total Cost of Ownership

    Factory price is only one part of the trailer’s five-year cost. A realistic comparison includes acquisition, fuel or energy effects, tires, maintenance, compliance, insurance, downtime, and the value recovered at disposal.

    Five-year TCO = acquisition + freight and import + fuel impact + maintenance and tires + compliance and insurance + downtime – residual value

    FOB Price vs. Total Landed Cost

    Do not approve a budget using the factory FOB price alone. Use the complete landed calculation:

    Landed cost = FOB price + ocean freight + insurance + import duty and tax + port and clearing fees + inland delivery + certification + assembly and commissioning

    Depending on destination, shipping method, duties, port conditions, and certification scope, landed cost can be 30% to 60% higher than the factory quotation. Request the same Incoterm and scope from every supplier before comparing offers.

    Cost area What to request Why it changes TCO
    Vehicle and options Signed specification, drawings, exclusions, brands or approved equivalents Prevents a low quote from hiding a lower system specification
    Freight and port Packing, stacking, lifting, securing, unstacking, and destination charges Exposes costs and damage risks outside the factory gate
    Operation Tare estimate, legal payload, tire plan, maintenance schedule, and spares Connects the specification to revenue, downtime, and cost per kilometer
    Compliance Approval responsibility, certificates, inspection plan, and route assumptions Reduces registration delay and post-arrival modification

    Factor 6: Residual Value – Plan the Exit Before Buying

    Residual value reduces net lifetime cost. A trailer with maintainable components, complete records, structural integrity, and a specification recognized by second-hand buyers is easier to sell than an unusual low-price build with unavailable parts.

    What Protects Resale Value

    Supported components

    Axle, suspension, landing gear, and brake brands with local parts and service protect uptime and buyer confidence.

    Maintenance evidence

    Inspection, alignment, brake, tire, coating, repair, and load records demonstrate how the asset was operated.

    Structural condition

    Traceable steel, controlled repairs, corrosion protection, and straight chassis geometry preserve value.

    Common architecture

    Widely serviceable dimensions and components generally have a larger secondary market than highly specialized one-off builds.

    Brand names such as BPW, FUWA, Jost, and SAF-Holland can support resale only where the components are genuine, correctly specified, and supported in the destination market. A premium component with no regional distributor can still create long downtime.

    Pre-Purchase Semi-Trailer Procurement Checklist

    Complete every row before requesting final factory quotations.

    Factor Buyer self-assessment Operational specification to record
    1. Application Primary cargo and loading/unloading method? Cargo type, density, dimensions, restraint, forklift, crane, tipping, ramp, pump, or pneumatic discharge
    2. Payload Maximum legal route GCM and target net payload? Tractor tare, trailer tare, axle groups, spacing, load distribution, and legal payload calculation
    3. Road conditions Sealed/unsealed share, temperature, dust, water, and gradients? Route survey, annual distance, speed, shock loads, brake-energy demand, ground clearance, and tire heat
    4. Regulations What type approval and registration documents apply? ADR/ROVER/PBS, EAEU or national approval, axle and dimension rules, lighting, brakes, permits, and customs documents
    5. TCO budget Landed-cost ceiling and five-year maintenance reserve? FOB scope, freight, tax, certification, assembly, fuel impact, tires, spares, labor, and downtime
    6. Residual value Ownership horizon and target exit value? Three-, five-, or eight-year plan, component support, documentation, condition standard, and likely secondary buyer

    Five Common Procurement Pitfalls

    1. Buying before securing the freight parameters: a trailer ordered without confirmed cargo and loading data often requires expensive compromise later.
    2. Selecting purely on invoice price: a small initial saving can be overtaken by downtime, tire wear, poor payload, and repairs.
    3. Copying another fleet’s specification: route, tractor, driver behavior, cargo distribution, registration, and service network may be different.
    4. Relying on overloading for profit: weigh-in-motion and telematics increase enforcement exposure, while overloading accelerates fatigue and can void warranty assumptions.
    5. Ignoring spare-parts availability: a specialized component without local stock can keep a trailer grounded while parts travel by air.

    Frequently Asked Questions

    What should I clarify first before buying a semi-trailer?

    Start with the cargo and loading method. The application determines the body type, deck, restraint, discharge, stability, and cleanliness requirements. Price comparison becomes meaningful only after that operating requirement is defined.

    Does a 50-ton design rating mean I can legally carry 50 tonnes?

    No. Structural capacity and legal payload are different. Legal payload depends on the complete tractor-trailer combination, tare weights, axle groups, spacing, national rules, route access, and load distribution.

    Should rough-road fleets always choose the heaviest chassis?

    No. The chassis should be engineered for the load spectrum and fatigue environment. Unnecessary weight reduces legal payload and fuel efficiency, while insufficient local reinforcement or poor welding causes fatigue. Request calculations, material traceability, drawings, and inspection evidence.

    How should I compare two semi-trailer quotations?

    Normalize the technical specification, Incoterm, freight and port scope, certification, component brands, tare, legal payload, spares, warranty, inspection, and commissioning. Then compare five-year TCO rather than only the factory price.

    What protects semi-trailer resale value?

    Use supported components, preserve maintenance and repair records, protect the chassis from corrosion, avoid undocumented modifications, and choose an architecture that second-hand buyers in the destination market can service.

    Regulatory Reference Points

    • Australia: NHVR general access, Performance Based Standards, Australian Design Rules, and the ROVER vehicle approval system.
    • Central Asia: EAEU TR CU 018/2011 for applicable member states plus each country’s national registration, road, and customs rules.
    • Africa: national road and vehicle authorities, with EAC, ECOWAS, COMESA, and SADC frameworks as regional context.
    • South America: national authorities including Chile CONASET and Brazil CONTRAN, plus route and permit authorities.

    Final Recommendation

    Document the six decisions in sequence: application, legal payload, road conditions, regulations, five-year TCO, and residual value. Then request quotations against one signed specification and compare suppliers on the same technical, commercial, inspection, delivery, and warranty scope. When the operating inputs are clear, the correct trailer category and system specification become much easier to defend.

    Need Engineering Support for Your Next Fleet Order?

    Send your cargo profile, tractor data, legal payload target, route conditions, registration market, destination port, annual mileage, and ownership horizon. The KALES international sales engineering team can prepare a route-matched specification, landed-cost review, and five-year TCO framework.

    Request a Free Route and Payload Consultation WhatsApp Us Email Inquiry

  • 15 Tri-Axle Flatbed Trailers for Ghana: A Tema Port Fleet Case Study

    15 Tri-Axle Flatbed Trailers for Ghana: A Tema Port Fleet Case Study

    Ghanaian fleet manager inspecting a delivered 3-axle 15m flatbed semi-trailer after customs clearance at Tema Port
    Kwame Mensah inspects one of the delivered tri-axle flatbed semi-trailers after the shipment cleared Tema Port in Ghana.

    Customer Cases & Delivery News · Published: July 20, 2026 · Updated: July 20, 2026 · Project period: March–June 2026 · Word count: 1952 · Reading time: 11 minutes

    15 Tri-Axle Flatbed Trailers for Ghana: A Tema Port Fleet Case Study

    Case-study disclosure and evidence basis

    This case was prepared by the Kales Vehicle export sales team from a completed customer project. Jenny Lee, the sales consultant responsible for the order, wrote the account, and the Overseas Business Department reviewed it before publication. Customer name and project details are published with the customer’s permission. Commercially sensitive terms, including the transaction price, remain confidential by mutual agreement.

    A Ghanaian transport company needed 15 heavy-duty, 3-axle 15m flatbed semi-trailers for container haulage and inland freight from Tema Port toward Kumasi, Tamale and the Burkina Faso border. The buyer was not looking for a generic catalog trailer. He wanted a maintainable West Africa semi-trailer specification, proof of the actual units before shipment, and a supplier willing to help when documentation issues appeared during clearance.

    Ghana flatbed trailer project at a glance

    • Customer: Kwame Mensah, procurement and fleet manager for a medium-sized Ghanaian transport company.
    • Operating area: Tema Port, Accra, Kumasi, Tamale and northern cross-border freight corridors.
    • Order: 15 tri-axle, 15m flatbed semi-trailers for container and building-material transport.
    • Key configuration: reinforced Q345B double-layer main beams, three 13-ton axles, mechanical leaf-spring suspension, 2-inch kingpin and WABCO relay-valve braking.
    • Trust requirement: individual photos and chassis videos of the real trailers before shipment.
    • Result: all 15 trailers reached Tema Port, cleared customs and entered the customer’s operating fleet.

    Customer background: an experienced Ghana fleet buyer

    Kwame Mensah is the procurement and fleet manager of a medium-sized transport company headquartered in Accra. The company’s fleet and maintenance base are located near Tema Port, one of West Africa’s most important container gateways. Its work combines inland line-haul freight with port container transport along the Tema–Kumasi–Tamale corridor and onward toward the Burkina Faso border.

    The company operates approximately 30 to 40 vehicles, mainly Sinotruk HOWO and SHACMAN tractor trucks and dump trucks. Mensah previously worked as a truck driver and a workshop apprentice. That practical background shaped the purchasing process: his questions focused on durability, brake performance, spare-parts availability, workshop familiarity and compatibility with the tractors already in service.

    Customer-authorised WhatsApp discussion about 3-axle flatbed trailer specifications for a Ghana fleet
    A customer-authorised WhatsApp excerpt from the technical discussion about axle capacity, suspension, kingpin compatibility and braking.

    The operating problem behind the order

    Growing container volumes around Tema Port and increasing building-material demand on northern routes had pushed the customer’s existing flatbed capacity close to its limit. The fleet therefore planned to add 15 tri-axle flatbed trailers, each 15 metres long, while keeping the equipment compatible with its existing tractors and workshop capability.

    The request included five practical requirements that are common among experienced Ghana and West Africa fleet buyers:

    • Structural reserve for demanding work: the customer wanted a heavy-duty chassis designed for a 60-ton load class and rough rainy-season roads. Structural capacity does not replace Ghanaian axle-load, gross-combination-mass or route compliance requirements; legal operating load must always follow the applicable rules.
    • Simple local maintenance: mechanical leaf-spring suspension was preferred over air suspension because local technicians understood it well and replacement parts were easier to source.
    • Compatibility with existing tractors: a 2-inch kingpin was required for the fleet’s HOWO and SHACMAN tractor units.
    • Reliable braking on gradients: long descents on northern routes made relay-valve performance, spring braking and optional ABS important discussion points.
    • Shipping and import coordination: the customer expected the supplier to prepare the shipment for Tema Port and respond quickly if the clearing agent needed document clarification.

    Why visible condition evidence mattered

    The customer had previously received trailers of inconsistent quality from another supplier. He therefore made one requirement especially clear: catalog images were not enough. Before shipment, he wanted unit-by-unit photos, underside views and chassis videos showing the actual trailers allocated to his order.

    This changed the service process. Production follow-up was not treated as a single final inspection message. Jenny and the factory team maintained a visual record during completion, inspection, packing and dispatch so the buyer could check the real equipment before it left China.

    How the 3-axle 15m flatbed trailer was configured

    The technical discussion followed a specification-first approach. Each choice was tied to the customer’s cargo, tractor fleet, route and maintenance environment rather than added as a marketing upgrade.

    Decision area Project configuration Reason for the choice
    Main beam Q345B high-strength steel with a reinforced double-layer structure Improved resistance to bending and fatigue during repeated heavy container and building-material work
    Axles Three 13-ton axles Matched the heavy-duty design target while keeping a familiar tri-axle service layout
    Suspension Mechanical leaf-spring suspension Better fit for the customer’s workshop skills, rough-road use and local parts access
    Braking WABCO relay-valve system, optional ABS and spring parking/emergency braking Addressed the customer’s repeated concern about long downhill sections and dependable air-brake response
    Tractor connection 2-inch kingpin Confirmed compatibility with the fleet’s HOWO and SHACMAN tractor trucks
    Electrical system LED lighting and water-resistant wiring protection Reduced exposure to rainwater, road spray and wet-season electrical faults
    Tyres and support parts 12 tyres plus one spare per trailer configuration, with additional spares and a starter parts package for the order Reduced the risk of avoidable downtime while replacement parts were being sourced

    Buyers comparing a similar specification can review the 3-axle flatbed container semi-trailer and then confirm the final length, load distribution, axle group, deck, twist locks and tractor interface for their own route.

    Rear-side view of a 3-axle 15m flatbed semi-trailer showing 13-ton axles and mechanical leaf-spring suspension before shipment
    Rear-side inspection view showing the tri-axle running gear and mechanical leaf-spring suspension selected for the Ghana fleet.

    Production evidence and shipment to Tema Port

    During the production cycle, the factory and export team photographed the completed units and shared videos showing chassis condition, running gear, lighting and the general finish. This evidence was sent through the same WhatsApp project channel used for technical confirmation, giving the customer a traceable record instead of a generic shipment update.

    The trailers were then prepared for ocean transport through Tianjin Port. The shipping scope included packing coordination, export documentation and communication with the customer’s clearing agent. When a documentation question arose during clearance, the Kales export team helped clarify the required information rather than leaving the buyer to resolve it alone.

    Packed 3-axle 15m flatbed semi-trailer ready for shipment from Tianjin Port to Tema Port in Ghana
    A packed 3-axle 15m flatbed semi-trailer prepared for export loading at Tianjin Port.

    Delivery result and customer feedback

    Within the March–June 2026 project window, all 15 flatbed semi-trailers arrived at Tema Port and cleared customs. The first units were then placed into service on the Tema–Tamale route for container and inland freight work.

    After the trailers entered operation, Mensah authorised Kales Vehicle to publish the following feedback:

    “The steel is solid and the welding is clean. Fully loaded with containers, the trailers have handled our rough roads without problems. The drivers are happy, and my mechanics say the workmanship is much better than on trailers we bought before.”

    — Kwame Mensah, Procurement and Fleet Manager

    His service feedback was equally specific: the promised photos and videos were delivered before shipment, messages were answered promptly, and the export team assisted when the clearing agent encountered a documentation issue. In his words, this kind of service “is not easy to find.”

    Customer-authorised WhatsApp feedback after the Ghana fleet received and operated the tri-axle flatbed semi-trailers
    Customer-authorised WhatsApp feedback confirming satisfaction with the delivered trailers and the project communication.

    Important context: this case reflects one customer’s experience under its own routes, loading practices, driver behaviour and maintenance system. Performance can differ under other axle loads, road surfaces, speeds, climates and maintenance conditions.

    The customer’s follow-up purchase plan

    The first 15 trailers were described as the initial phase of a broader fleet expansion. Mensah plans to operate them for two to three months before making the next decision. If the operating results continue to meet expectations, the company intends to consider another 15 trailers of the same type and may also add low-bed trailers for machinery transport.

    He also offered to introduce Kales Vehicle to two transport companies in Accra. This is a stated customer plan, not a completed repeat order, and it will depend on the fleet’s continuing operating results and future procurement approval.

    What other West African fleet buyers can learn

    1. Match the trailer to the local maintenance ecosystem. Mechanical suspension was selected because the customer’s technicians could repair it and source parts locally. Air suspension may be the better choice for other fleets, but it was not automatically the right choice here.
    2. Confirm tractor compatibility before production. Kingpin size, fifth-wheel height, turning clearance, air couplings, electrical connectors and brake interfaces must be checked together. The site’s tractor-trailer matching guide explains the measurements buyers should provide.
    3. Use evidence instead of promises. Photos and videos of the allocated units gave the buyer a practical way to check condition before shipment.
    4. Bring documentation support into the project early. Export delivery does not end when the trailer leaves the factory. Packing, shipping documents and clarification for the clearing agent can determine whether equipment reaches service on schedule.
    5. Compare route fit, not only purchase price. The broader Africa semi-trailer buying guide covers axle rules, suspension, brakes, tyres, corrosion and landed lifecycle cost.

    Buyer questions from this Ghana flatbed trailer project

    Why did this Ghana fleet choose mechanical leaf-spring suspension?

    The customer’s technicians already understood mechanical suspension, replacement parts were easier to source locally, and the fleet expected rough-road service. The choice was based on maintenance capability and route conditions, not on a claim that leaf springs are always better than air suspension.

    How were the trailers matched to the customer’s HOWO and SHACMAN tractors?

    The project confirmed a 2-inch kingpin and reviewed tractor compatibility as part of the specification discussion. Buyers should also confirm fifth-wheel height and position, turning clearance, air couplings, voltage, lighting connectors and ABS or EBS interfaces before production.

    What pre-shipment evidence did the customer receive?

    The customer received photos and videos of the actual trailers, including chassis, underside, running gear, lighting, packing and dispatch views. These were project records for the allocated units rather than catalog images.

    Does a 60-ton structural design mean 60 tonnes can be carried legally on every Ghana route?

    No. Structural design capacity and legal road payload are different. Legal operation depends on Ghanaian axle-load limits, axle spacing, tractor configuration, gross combination mass, cargo distribution and any route-specific requirements. Buyers must confirm the complete combination with the relevant authorities and operators.

    Project records used for this case study

    • Customer-approved project summary and publication consent.
    • WhatsApp specification discussions between the buyer and Jenny Lee.
    • Factory completion photos, chassis videos and pre-shipment inspection records.
    • Shipment and Tema Port clearance communication from the March–June 2026 project.
    • Customer feedback shared after the first trailers entered service.

    Transaction price and other agreed commercial terms are intentionally excluded.

    Final project takeaway

    This Ghana flatbed trailer case was won through a combination of route-specific configuration, workshop-friendly component choices, visible production evidence and practical export support. The result does not prove one universal specification for West Africa. It shows why a fleet buyer and manufacturer should define cargo, route, tractor, legal limits, maintenance resources and inspection evidence before finalising a heavy-duty semi-trailer order.

    Request a flatbed trailer specification for your African route

    Send your destination country, cargo, container size, legal payload target, tractor model, fifth-wheel height, route conditions and preferred suspension. The Kales Vehicle overseas team can review the operating requirement and prepare a configuration for discussion.

    Contact the Kales Vehicle overseas team

  • Africa Semi-Trailer Guide

    Africa Semi-Trailer Guide

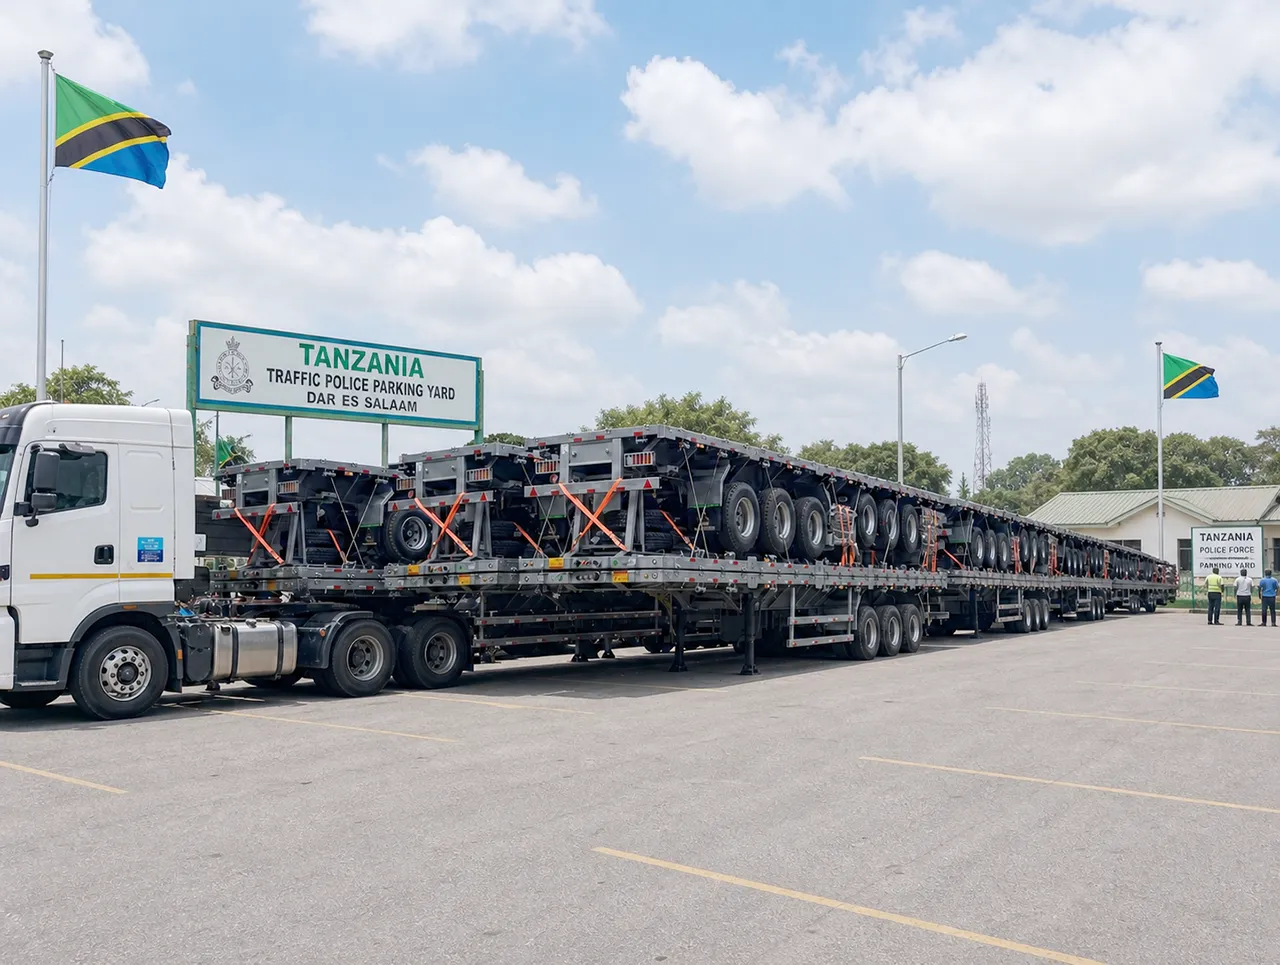
    Fleet of Kales three-axle flatbed semi-trailers prepared for delivery to a logistics customer in Tanzania
    Export flatbed semi-trailers prepared for an East African fleet program. Final specifications should be matched to the destination country, route, cargo, and tractor.

    Published: July 10, 2026 · Updated: July 10, 2026 · Industry Knowledge & Buying Guides · Word count: 2542 · Reading time: 15 minutes

    Africa Semi-Trailer Guide

    Jason, Lead Engineer at Kales Vehicle

    Reviewed by Jason
    Lead Engineer, Kales Vehicle

    The best semi-trailer for Africa is not one universal heavy-duty model. It is a trailer specified for a named country, legal axle regime, cargo, road corridor, tractor, workshop network, and port plan. East African corridor fleets often prioritize axle-load compliance and grade performance; Southern African fleets usually need precise combination, dimensional, braking, and high-speed stability checks; West African buyers commonly place more weight on rough-road durability, corrosion control, heat management, and parts availability. Confirm the rules in every country on the route before production.

    Quick Answer: How to Buy a Semi-Trailer for Africa

    • Start with the operating country and corridor, not a catalog payload. Legal mass depends on national rules, axle spacing, axle groups, tractor configuration, and the complete vehicle combination.
    • Send the real cargo profile. Include maximum single-piece weight, load distribution, density, dimensions, loading method, and empty-return frequency.
    • Match the trailer to the tractor before ordering. Fifth-wheel height, kingpin position, turning clearance, air and electrical connections, braking control, and gross combination limits must work together.
    • Choose running gear for the route and service network. Suspension, tires, wheels, brakes, axles, and spare parts should be maintainable where the trailer operates.
    • Compare landed lifecycle cost, not ex-factory price alone. Include freight, port handling, tax, assembly, homologation, spares, fuel, tires, maintenance, and downtime.

    Seven Inputs to Define Before Requesting a Semi-Trailer Quote

    Africa is not one homologation or operating zone. Even where regional programs encourage harmonization, national authorities enforce vehicle registration, dimensions, axle loads, roadworthiness, dangerous-goods rules, and permits. A useful quotation therefore begins with operating data, not only a request for a “60 ton trailer.”

    1. Countries and exact route: list the registration country, every transit country, border crossings, ports, mine or construction sites, paved-road share, unpaved-road share, gradients, and seasonal access constraints.
    2. Cargo: state cargo type, density, maximum payload requested, maximum legal payload expected, single-piece weight, dimensions, center of gravity, loading equipment, and load-restraint method.
    3. Tractor: provide tractor make and model, axle layout, fifth-wheel height and position, permitted gross combination mass, tire size, air couplings, voltage, lighting connector, and ABS/EBS interface.
    4. Legal envelope: confirm overall length, width, height, axle-group mass, axle spacing, turning requirements, underrun protection, lighting, braking, and any abnormal-load permit conditions with the relevant road authority.
    5. Duty cycle: give annual distance, trips per day, average speed, empty-return share, loading cycles, ambient temperature, dust, mud, standing water, coastal exposure, and downtime target.
    6. Maintenance capability: identify local axle, brake, suspension, tire, electrical, hydraulic, and welding support. Specify preferred brands only after checking parts availability.
    7. Delivery scope: define Incoterm, destination port, stacking or containerization method, port lifting plan, assembly responsibility, documentation, commissioning, training, warranty process, and initial spares.

    Use the tractor-trailer matching guide to measure fifth-wheel height, front swing radius, rear clearance, and kingpin setback before approving a drawing.

    East, West and Southern Africa Semi-Trailer Specification Matrix

    This matrix is a procurement starting point, not a legal approval. Country regulations and route surveys take priority over regional labels.

    Regional Fit

    What to verify first in each operating region

    The right specification follows the corridor, cargo, tractor, and repair network.

    East Africa

    First checks: EAC/national axle-load rules, weighbridge exposure, long inland corridors, grades, border operation, tire availability, and empty returns.

    Common applications: container and general cargo flatbeds, sidewall trailers, tankers, and construction logistics.

    Southern Africa

    First checks: national combination and dimensional rules, vehicle standards, high-speed stability, mining or abnormal-load permits, braking, and established parts networks.

    Common applications: mining tippers, lowbeds, tankers, container chassis, and highway freight trailers.

    West Africa

    First checks: national and transit-country rules, pavement variability, drainage and rainy-season exposure, heat, corrosion, port conditions, and field-service capability.

    Common applications: general-cargo flatbeds and sidewalls, tankers, cement bulkers, tippers, and construction-support trailers.

    Regional Buying Guidance for African Fleets

    East Africa: Design Around the Corridor and Weighbridge

    For Kenya, Tanzania, Uganda, Rwanda, Burundi, South Sudan, and other East African operations, begin with the current national implementation of regional vehicle-load controls. The East African Community acts library is a useful official reference point, but buyers should still obtain written confirmation from the registration authority and road agency in every operating country.

    Long port-to-inland routes make axle distribution, grade performance, tire temperature, brake heat, and fuel consumption important. Do not assume a tri-axle layout automatically gives a particular legal payload. The tractor axle layout, trailer axle spacing, tare mass, load position, and local formula all affect the legal result.

    Air suspension and a lift axle may help in a compliant design where the route, regulation, controls, and service network support them. Mechanical suspension can remain the more repairable choice on severe roads or in workshops with limited pneumatic capability. Compare both options in the leaf spring versus air suspension guide.

    Southern Africa: Verify the Complete Vehicle Combination

    South Africa and neighboring SADC markets have developed freight corridors, but a capable highway does not remove legal or engineering constraints. Verify the complete combination: tractor, semi-trailer, axle groups, dimensions, coupling geometry, brakes, tires, lighting, speed rating, load restraint, and any cross-border requirements. The SADC transport program provides regional context; national road-traffic and standards authorities remain the final sources for an individual vehicle.

    Mining and project cargo require a route survey and permit review before a lowbed or heavy tipper is frozen. The machine footprint, concentrated load, deck height, ramp angle, ground clearance, articulation, bridge limits, and escort conditions matter more than a headline tonnage. Buyers comparing platforms should first review flatbed, step-deck, and lowbed selection.

    West Africa: Prioritize Durability Without Oversimplifying the Region

    Nigeria, Ghana, Côte d’Ivoire, Senegal, and their neighboring markets do not share one road condition or one vehicle rule. A coastal highway, Sahel corridor, urban port route, quarry road, and remote construction site create different requirements. Confirm national and transit-country regulations, then document the actual route condition and maintenance network.

    For rough roads, examine fatigue-sensitive details: crossmember spacing, suspension mounting, local reinforcement, weld access, landing-gear bracing, mud protection, hose routing, electrical sealing, and tire clearance. For coastal and humid service, specify surface preparation, coating system, cavity protection, fastener treatment, drainage, and inspection criteria rather than asking only for “anti-rust paint.” The semi-trailer painting and anticorrosion guide explains the evidence buyers should request.

    Brake choice must follow the risk profile. Mud and simple field service may favor proven drum-brake packages in some fleets, while frequent high-energy braking, modern diagnostics, or applicable homologation may favor disc brakes with the correct control system. Neither design is universally safer in every West African duty cycle. Compare heat, inspection, spares, ABS/EBS compatibility, and technician capability in the disc versus drum brake guide.

    How to Specify the Main Trailer Systems

    Chassis and Payload

    A heavier chassis is not automatically more durable, and a lighter chassis is not automatically more profitable. The design must carry the declared load spectrum while controlling fatigue, deflection, local stress, tare mass, weld quality, and repairability. Ask for a general arrangement drawing, material certificates for critical steel, welding and inspection records, axle-load calculation, tare-weight estimate, and payload statement tied to the intended legal combination. The semi-trailer chassis material guide covers Q355-class and high-strength steels, aluminum, traceability, and welding controls.

    Suspension, Axles, Tires and Wheels

    Choose suspension only after defining the road, load variability, rollover sensitivity, empty mileage, service network, and regulatory needs. Confirm axle rating, track width, brake package, bearing and seal availability, wheel-end inspection method, alignment tolerances, and local parts support. Tire size must fit legal axle loads, rim capacity, ground clearance, inflation practice, speed, heat, and replacement availability. Use the semi-trailer tire and wheel selection guide before approving super singles, duals, steel wheels, or aluminum wheels.

    Braking and Electrical Compatibility

    Specify the braking system as a tractor-trailer system. Confirm service and emergency circuits, ABS/EBS architecture, power connector, warning lamps, diagnostic access, load sensing, spring-brake behavior, reservoir capacity, hose protection, and local compliance. UNECE Regulation No. 13 is an internationally recognized braking reference and is available from the UNECE vehicle regulations portal; it does not replace destination-country approval. For system-level choices, review the semi-trailer braking systems guide.

    Body Type and Cargo Control

    Use a flatbed or skeletal trailer for containers only when twist-lock positions, deck loading, and route rules match the container program. Use sidewalls or fences when cargo retention and mixed freight justify them. Use a lowbed for machinery only after checking concentrated loads and route clearance. Tankers and bulkers require cargo compatibility, pressure or discharge design, rollover assessment, valves, emergency controls, cleaning, and dangerous-goods compliance where applicable.

    Representative product pages can help define questions, but they are not substitutes for engineering approval. Compare a 40 ft flatbed semi-trailer, an Africa-focused drop-side trailer, and a 45,000 L aluminum fuel tanker only after the route and cargo requirements are documented.

    Compare Landed Lifecycle Cost, Not Only the Trailer Price

    A low ex-factory quotation can become expensive after ocean freight, port storage, lifting, assembly, customs, homologation, local modifications, unavailable spares, tire mismatch, or downtime. Request a transparent commercial comparison with the same scope for every supplier.

    Cost or risk What to request Why it matters
    Vehicle and options Base specification, option list, exclusions, currency, validity, and production lead time Prevents unlike-for-like quote comparisons
    Freight and port Incoterm, shipping method, package dimensions, lifting points, unstacking plan, and destination charges Exposes costs that sit outside the factory price
    Compliance Drawings, certificates, destination review responsibility, inspection plan, and permit assumptions Reduces rework and registration delay
    Operation Estimated tare, legal payload calculation, tire configuration, fuel-sensitive options, and maintenance schedule Connects the specification to revenue and running cost
    Support Warranty terms, claim workflow, remote support, parts list, prices, and recommended initial stock Limits downtime after delivery

    If the purchase also includes tractor heads, inspect and price them separately. The refurbished HOWO truck guide for African fleets provides a structured inspection and warranty checklist.

    How to Verify an Export Semi-Trailer Supplier

    Supplier verification should produce evidence, not only sales claims. Ask for business registration, factory address, recent production media, welding and quality procedures, component traceability, drawing control, inspection records, loading plan, warranty terms, and references relevant to the same trailer type and duty cycle. For remote inspections, require a live video sequence tied to the vehicle identification and agreed inspection points.

    • Before deposit: approve the technical specification, drawing, component brands or acceptable equivalents, inspection plan, delivery scope, change-control rule, payment milestones, and warranty.
    • During production: review material and component records, key dimensions, weld preparation, alignment, coating preparation, and any agreed hold points.
    • Before shipment: verify VIN/chassis identity, tare where available, dimensions, brake and lighting function, leaks, fastener torque records, coating checks, accessories, spares, documents, and packaging.
    • At destination: follow the approved lifting and assembly plan, inspect transport damage, commission the trailer, train operators, and record the handover condition.

    Semi-Trailer RFQ Checklist for African Buyers

    Send this minimum data set with the first request for quotation:

    • Registration country, transit countries, destination port, and exact operating corridor
    • Cargo type, density, maximum unit weight, dimensions, center of gravity, and loading method
    • Desired payload and the legal limit confirmed for the intended vehicle combination
    • Tractor model, axle layout, fifth-wheel height, coupling position, voltage, air connectors, and ABS/EBS interface
    • Road surface mix, maximum gradient, ambient temperature, rain, dust, mud, coastal exposure, and annual distance
    • Preferred locally supported axle, suspension, brake, tire, wheel, hydraulic, and electrical brands
    • Required certificates, inspection witness points, Incoterm, delivery date, spares, training, and warranty support

    Frequently Asked Questions

    What is the best semi-trailer for African roads?

    There is no single best model for all African roads. The correct trailer is the one matched to the destination country’s laws, cargo, route surface, gradients, tractor, loading method, climate, and local maintenance network. A compliant flatbed for an East African corridor may need a different suspension, brake, tire, and corrosion package from a mining lowbed in Southern Africa or a coastal tanker in West Africa.

    Is a three-axle semi-trailer legal everywhere in Africa?

    No. A three-axle layout does not create one continent-wide legal payload. Legality depends on national rules, axle and axle-group limits, spacing, dimensions, tractor configuration, gross combination limits, cargo distribution, and sometimes route permits. Confirm the complete combination with the responsible authority in every operating country.

    Should African fleets choose leaf spring or air suspension?

    Choose by duty cycle and support capability. Mechanical leaf spring suspension can offer simpler field repair and strong rough-road tolerance. Air suspension can improve ride, load sharing, height control, and compatibility with some lift-axle or sensitive-cargo applications, but it requires suitable controls, protection, parts, and technicians. Neither is universally correct.

    Are drum brakes always better than disc brakes in West Africa?

    No. Drum brakes may be attractive where parts familiarity, mud exposure, and simple field service dominate. Disc brakes may suit fleets that value inspection access, consistent response, modern EBS integration, and managed high-energy braking. The decision must also consider heat, dust, water, axle specification, tractor compatibility, local regulation, and workshop skill.

    What documents should I request before paying a semi-trailer deposit?

    Request the signed technical specification, general arrangement drawing, commercial scope, component schedule, inspection plan, certificate list, production and delivery schedule, packaging plan, warranty terms, change-control procedure, and payment milestones. Clarify who is responsible for destination-country approval before production begins.

    How many semi-trailers can be stacked for ocean shipping?

    There is no safe universal number. Stacking depends on trailer type, structure, dimensions, carrier acceptance, port equipment, lifting analysis, securing design, and destination unstacking capability. Require a shipment-specific packing drawing, lifting points, center-of-gravity information, securing method, and an approved unstacking procedure.

    Sources and Compliance References

    Reviewed July 10, 2026. These sources provide regional or technical context. Buyers must verify the latest national rules and obtain destination-country approval for the exact vehicle combination.

    Final Recommendation

    Buy the route, not the brochure. Freeze the country, corridor, cargo, tractor, legal envelope, duty cycle, and maintenance plan before selecting payload, axle count, suspension, brakes, tires, or steel grade. Then compare suppliers on documented compliance, manufacturing evidence, landed lifecycle cost, and support. This process produces a more defensible African semi-trailer specification than adding weight or choosing the lowest quotation.

    Request an Africa Route-Specific Trailer Specification

    Send your destination country, operating corridor, cargo, tractor details, expected legal payload, road conditions, port, and preferred delivery term. The Kales Vehicle team can review the inputs and prepare a configuration and drawing for local compliance confirmation.

    Contact Kales Vehicle for a semi-trailer specification review

  • Semi-Trailer Electrical Systems Guide: 7-Pin vs 15-Pin Architecture & Troubleshooting

    Semi-Trailer Electrical Systems Guide: 7-Pin vs 15-Pin Architecture & Troubleshooting

    Technical Support · Published: June 11, 2026 · Updated: June 11, 2026 · Word count: 2615 · Reading time: 15 minutes

    Semi-Trailer Electrical Systems Guide: 7-Pin vs 15-Pin Architecture & Troubleshooting

    Jason, Lead Engineer at Kales Vehicle

    Reviewed by Jason
    Lead Engineer, Kales Vehicle

    For most export semi-trailers, the real connector choice is not about counting pins. It is about deciding whether the trailer only needs basic lighting circuits or whether it also needs reversing lamps, rear fog lamps, auxiliary electrical functions, and cleaner integration with modern tractor electrical systems. Choose the wrong standard and the result is not only annoying lighting faults. It can mean mismatched adapters, repeated roadside repairs, and avoidable downtime across mixed fleets.

    Quick Answer for Fleet Managers

    • 7-pin ISO 1185 / 24N remains the rugged basic-lighting choice for many developing-market trailers where simplicity and roadside repairability matter most.
    • 15-pin ISO 12098 is the better fit for modern export builds because it combines normal and supplementary lighting circuits in one connector and supports a cleaner electrical architecture.
    • Do not use the lighting connector for braking electronics. Trailer ABS/EBS systems require their own dedicated ISO 7638 connector and must not be treated as an extension of the lighting plug.
    • The most common field failure is still a bad ground. Dimming lamps, erratic flash rates, and “all lights go strange when braking” usually point to an earth fault before they point to a bad LED lamp.
    • Harsh-route survival depends on sealing and routing, not only connector type. IP-rated lamps, molded harness branches, and proper chassis clamping matter as much as the plug standard itself.

    The practical export rule is simple: use 7-pin when the trailer only needs basic lighting and easy field service; use 15-pin when the build needs full rear-light coverage and cleaner modern integration; and keep ISO 7638 separate for ABS/EBS braking electronics.

    Critical Safety Rule

    Never try to “borrow” power or data for the trailer braking system from the lighting connector. Even on modern trailers, the lighting plug and the braking-electronics plug are different systems with different safety consequences.

    • Lighting connector: handles road-lighting and auxiliary lighting circuits.
    • ISO 7638 connector: supplies dedicated power and communication support for trailer ABS/EBS.
    • Workshop rule: if a trailer has both lighting and braking-electronics issues, diagnose them as separate circuits before replacing parts.

    What 7-Pin and 15-Pin Actually Mean on a Semi-Trailer

    In export heavy-duty fleets, the connector decision usually sits between the older ISO 1185 24N 7-pin system and the newer ISO 12098 15-pin system. The older system was built around the minimum legal lighting functions needed to keep trailers moving. The newer system was built to reduce connector count and handle a fuller rear-light package in one housing.

    The important practical distinction is this: the 7-pin system is a basic-lighting connector, while the 15-pin system is a broader trailer-electrical connector. That is why 15-pin is usually the better default for new higher-spec trailers, especially when fleets want reverse lights, rear fog, better sealing, and fewer “mystery adapter” problems across mixed tractor units.

    How to Read the Featured Connection Layout

    The featured image on this page shows a typical front connection set used on a KALES refrigerated semi-trailer. The exact socket mix can vary by destination market and tractor matching, but the numbered photo should be read as a functional map, not as six interchangeable connectors.

    1. No. 1 – Supply air line: this line charges the trailer air reservoirs directly and maintains the continuous air source needed for parking-brake release and emergency-brake reserve.
    2. No. 2 – ISO 1185 7-pin main lighting socket: this is the primary road-lighting connector for legally required lamp functions such as turn signals, brake lamps, tail lamps, and marker lamps. It remains the most common heavy-trailer lighting standard across Europe, China, and many export markets.
    3. No. 3 – Supplementary 7-pin auxiliary socket: in older twin-plug 24N/24S layouts, this socket is used for auxiliary electrical functions beyond the basic lighting circuit. On KALES refrigerated trailer builds, it is often reserved for reefer monitoring signals or backup auxiliary power logic.
    4. No. 4 – ISO 7638 ABS/EBS socket: this connector is dedicated to trailer braking electronics. It provides the separate power and communication support required by ABS or EBS and should never be treated as an extension of the lighting plug.
    5. No. 5 – ISO 12098 15-pin 24V socket: this connector combines normal and supplementary lighting functions in one housing and is usually chosen when the trailer needs a cleaner high-spec electrical architecture. On some higher-spec KALES reefer programs, the same front connection package also supports broader tractor-trailer integration such as CAN-based data exchange, refrigeration-status interfaces, TPMS feedback, or reversing-assist expansion, depending on market specification.
    6. No. 6 – Service / control air line: this line transmits the driver’s brake-pedal signal to the trailer control valve so the trailer braking force follows the tractor braking command.

    The practical takeaway from the image is straightforward: Nos. 2, 3, and 5 handle lighting or auxiliary electrics, No. 4 belongs only to ABS/EBS, and Nos. 1 and 6 are pneumatic lines rather than electrical connectors. That separation is exactly why 7-pin, 15-pin, and ISO 7638 should never be treated as interchangeable in workshop practice.

    Standard What it usually covers What it does not replace Best-fit operating profile
    ISO 1185 7-pin (24N) Basic trailer lighting such as turn, stop, tail, and marker logic Supplementary lighting often needs a second connector; ABS/EBS still stays separate Basic flatbeds, tippers, skeletal trailers, and mixed-road fleets that prioritize simplicity
    ISO 12098 15-pin Normal plus supplementary rear-light circuits in one connector, with cleaner support for modern trailer electrics ABS/EBS still requires ISO 7638; it is not a substitute for braking-electronics wiring Modern export trailers, ADR-minded fleets, and higher-spec combinations running newer tractors
    ISO 7638 Dedicated trailer braking-electronics power and communication support It is not a lighting connector and should not be used to power rear lamps Any trailer with ABS or EBS

    7-Pin vs 15-Pin: Functional Difference That Matters in the Workshop

    The classic 7-pin system remains common because it is easy to understand, easy to repair, and widely familiar in workshops from East Africa to Central Asia. If the trailer only needs basic lighting and the fleet already carries common 7-pin suzi coils, it still does the job well enough.

    The limitation is that the 7-pin system was never designed to be the clean answer for every modern rear-light function. Once a trailer needs supplementary circuits, more disciplined waterproofing, or smoother compatibility with newer tractors, the 15-pin system becomes easier to defend technically and commercially.

    Functional Coverage Comparison

    Electrical need 7-pin 24N 15-pin Field implication
    Basic stop / tail / turn lighting Yes Yes Both systems can support standard highway trailer lighting.
    Supplementary rear-light circuits such as reverse or rear fog Usually needs extra connector logic Integrated more cleanly in one plug 15-pin reduces adapter confusion and duplicate connector maintenance.
    Single-plug higher-spec lighting architecture No Yes 15-pin is easier to manage on modern higher-spec trailer builds.
    ABS/EBS braking-electronics support No No Use ISO 7638 separately every time.

    Workshop note: do not rewire by memory or by color alone. Exact pin assignment should always be confirmed against the tractor and trailer wiring documentation, especially in mixed fleets or regional crossover setups.

    Where ISO 7638 Fits and Why It Must Stay Separate

    The most common misunderstanding in mixed export fleets is assuming that “more pins” means the lighting connector can also handle trailer braking electronics. That is incorrect. If the trailer uses ABS/EBS braking control, the system should use a dedicated ISO 7638 connector for power and braking-electronics support.

    This separation matters because lighting faults and braking faults behave differently, fail differently, and carry completely different risk levels. A bad tail-lamp ground is an inconvenience and a legal risk. A compromised ABS/EBS feed can remove anti-lock or stability-support function from the trailer. For that reason alone, lighting and braking circuits should never be merged in workshop improvisations.

    Semi-trailer schematic showing ISO 7638 power supply separated from normal trailer lighting and braking pneumatics.
    On modern semi-trailers, ISO 7638 is treated as a dedicated braking-electronics feed, not as an extension of the normal lighting connector.

    Regional Compatibility Traps Fleets Should Check Before Shipment

    Connector failures in export markets are often caused before the trailer reaches the road. The real problem is usually standard mismatch: one side of the combination expects one connector logic, the other side expects another, and the workshop tries to solve the difference with a low-quality adapter or improvised rewiring.

    Australia is a common example because fleets may encounter 12V and 24V crossover situations plus local pin-function expectations that do not align cleanly with a European trailer specification. The right answer in those cases is not guesswork. It is a confirmed crossover solution, proper voltage adaptation where needed, and a documented tractor-trailer electrical check before dispatch.

    Pre-Shipment Electrical Compatibility Checklist

    • Confirm whether the tractor fleet is standardized on 7-pin, 15-pin, or mixed connectors.
    • Confirm whether supplementary rear-light functions are mandatory in the destination market.
    • Confirm whether the tractor and trailer both use 24V or whether voltage adaptation is needed.
    • Confirm that the trailer has a separate ISO 7638 plug if ABS/EBS is specified.
    • Confirm whether the fleet expects direct connection or will depend on adapters in daily service.

    Why IP Rating and Harness Design Decide Real-World Uptime

    On rough export routes, connector standard alone does not keep the lights working. Water intrusion, vibration, and abrasion usually kill the system first. That is why the lamp IP rating, harness branching method, and chassis routing standard matter as much as whether the trailer uses 7-pin or 15-pin.

    Component choice Minimum acceptable logic When to upgrade further
    Rear LED lamps IP67 highway-duty sealing Move to IP68 or IP69K for mining, flooded roads, or frequent pressure washing
    Main chassis harness Molded branch points and sealed connectors Avoid taped or open-splice repairs on high-humidity routes
    Suzi coil / spiral cable Correct length, no catwalk drag, no overstretch at full articulation Replace at first sign of sagging, cracking, or intermittent light faults
    Chassis routing Clamp every 500 mm to 600 mm and protect pass-through points Add rubber grommets and abrasion sleeves anywhere the loom crosses steel edges

    The Most Common Trailer Lighting Failure Is Still a Bad Ground

    Across working fleets, the number-one electrical fault is not a failed LED board. It is a bad ground path. If the tail lamps dim when the brake lamp comes on, if one turn signal makes another lamp glow weakly, or if the flash rate becomes erratic only under load, the first suspect is the earth connection.

    This is especially common on older repairs where the ground eyelet was bolted over paint, corrosion, or contaminated chassis metal. A poor ground raises circuit resistance and creates cross-feed behavior that makes the lamps look “haunted” even though the lamp assemblies themselves are still good.

    Fast Diagnostic Sequence for Trailer Electrical Faults

    Field symptom First check Second check / do not assume first
    All rear lamps are dead Connector seating, tractor output, main ground continuity Then inspect suzi coil damage and fuse logic before replacing lamp units
    Lights dim when braking Main earth path and chassis ground point Then inspect corrosion inside the connector body and branch connectors
    Turn signal flashes erratically Ground quality and connector pin contact Then isolate trailer-side lamp load versus tractor-side flasher logic
    Fault only appears in rain or after washing Connector sealing and branch-splice moisture ingress Then inspect lamp IP rating and cracked cable jackets
    Fault happens only on full articulation Spiral cable stretch, broken internal conductor, connector strain Then inspect catwalk drag damage and routing length mismatch

    Top 3 Maintenance Practices That Prevent Most Lighting Downtime

    1. Clean and re-seat the ground path first: if the trailer has weird combined-light behavior, remove corrosion and ensure the ground eyelet bites into clean bare metal.
    2. Inspect the suzi coil every service cycle: if the coil sags, cracks, or rubs on the catwalk, replace it before intermittent faults become total failure.
    3. Secure the harness properly: clamp the loom at regular intervals and protect every pass-through point so vibration cannot cut the insulation.

    When Fleets Should Prefer 15-Pin Over 7-Pin

    Specify 15-pin when the trailer program already includes higher-spec lighting, newer Euro-oriented tractors, or fleet rules that prioritize clean standardization over lowest first cost. In practice, this often applies to tanker fleets, hazardous-goods-minded programs, refrigerated or high-spec dry vans, and export buyers who do not want to live with a second supplementary connector.

    Specify 7-pin when the trailer is intentionally basic, the service environment is rough, and the fleet values mechanical simplicity above all else. Many flatbeds, tippers, and skeletal trailers still fit that logic well, especially when the workshop must keep equipment running with minimal specialized parts.

    Frequently Asked Questions

    Can I run a modern trailer on a 7-pin connector if it only needs basic lights?

    Yes, if the trailer truly only needs basic lighting circuits and the fleet accepts that supplementary functions may require extra connector logic. The decision becomes risky only when the operating requirement quietly grows beyond what the basic connector was chosen to support.

    Can I use the 15-pin lighting connector instead of ISO 7638 for ABS/EBS?

    No. The lighting connector and the ABS/EBS connector serve different functions and different safety priorities. Trailer braking electronics should stay on their dedicated ISO 7638 circuit.

    Why do my trailer lights dim or flash strangely when I hit the brakes?

    The most common cause is a bad ground connection. Check the main earth point, connector corrosion, and ground continuity before replacing lamp bodies or rewiring the whole rear harness.

    When should I treat a trailer electrical fault as a harness problem instead of a lamp problem?

    If the fault appears only in rain, only during articulation, or affects multiple lamps at once, suspect the harness, connector body, or ground path before blaming a single LED fixture.

    What should I send if I need remote electrical troubleshooting support?

    Send the tractor connector type, trailer connector type, voltage, photos of the plug faces, a short video of the symptom, and photos of the chassis ground point and spiral cable. That usually shortens diagnosis much faster than describing the fault by phone.

    Our Final Recommendation

    For most export fleets, 7-pin still makes sense when the trailer is deliberately basic and the workshop values easy roadside repair. But for new higher-spec trailers, 15-pin is usually the cleaner long-term choice because it simplifies supplementary lighting and reduces connector sprawl. In both cases, the non-negotiable rule stays the same: keep ABS/EBS on its own ISO 7638 connector, and treat the ground path as the first diagnostic point whenever lighting behavior becomes erratic.

    Need help choosing the right trailer electrical specification?

    Send your trailer type, destination market, tractor connector standard, voltage, and whether the build needs reverse lights, rear fog, or ABS/EBS integration. The KALES engineering team can recommend the practical connector and harness package before production.

    WhatsApp Us Email Inquiry

  • Semi-Trailer Tire & Wheel Selection Guide: 12R22.5 vs 295/80R22.5, Steel vs Aluminum

    Semi-Trailer Tire & Wheel Selection Guide: 12R22.5 vs 295/80R22.5, Steel vs Aluminum

    Industry Knowledge & Buying Guides · Published: June 9, 2026 · Updated: August 4, 2026 · Word count: 3272 · Reading time: 19 minutes

    Semi-Trailer Tire & Wheel Selection Guide: 12R22.5 vs 295/80R22.5, Steel vs Aluminum

    Jason, Lead Engineer at Kales Vehicle

    Reviewed by Jason
    Lead Engineer, Kales Vehicle

    Choosing semi-trailer tires and wheels is not a routine parts decision. It directly affects payload, fuel economy, casing life, brake heat control, and workshop risk. For fleets running across Africa, Central Asia, Southeast Asia, South America, and Australia, the right specification is the one that matches the harshest real section of the route, not the smoothest part of the brochure route.

    Quick Answer for Fleets

    • Choose 12R22.5 when your trailer needs more sidewall height, more ground-clearance tolerance, and better survival on rough or mixed-surface routes.
    • Choose 295/80R22.5 when your trailers spend most of their time on paved, higher-speed highway work where lower ride height and more stable highway behavior matter more.
    • Choose 11R22.5 for standard-load, medium-duty, urban, and legacy applications only after confirming that its load index covers the actual axle load.
    • Radial tires usually make more sense for long-haul paved work because they run cooler and more efficiently, while bias tires still earn their place in severe off-road and mining service.
    • Forged aluminum wheels are a weight-and-heat decision, not just a cosmetic upgrade. They can recover useful payload, but the hub stud length and re-torque protocol must be checked first.
    • If your fleet is considering super single tires, pair the change with TPMS or ATIS. On remote corridors, blowout management matters as much as fuel savings.

    KALES route-first rule: spec trailer tires and wheels for the worst 10% of the route, because that is where sidewall cuts, rim damage, brake heat, and downtime usually start.

    Why Tire and Wheel Spec Is a Fleet Profit Decision

    On a semi-trailer axle group, tires and wheels control more than rolling. They influence deck height, trailer stability, tread wear rate, bearing and suspension load, downhill heat behavior, and how much dead weight the fleet is dragging every kilometer. That is why tire and wheel selection belongs in procurement planning, not only in the workshop after the trailer is already built.

    For a long-haul tractor-trailer logging more than 200,000 km (125,000 miles) per year, tire procurement, retreading, replacement, and fuel-efficiency variance can put tire-related operating expense in the range of $6,000 to $10,000 USD annually. The purchase decision must therefore be evaluated as part of total cost of ownership, not as a unit-price comparison.

    Decision area What tire and wheel choice changes What the fleet feels in practice
    Payload Wheel weight and tire format change rolling-package mass Lighter highway packages can recover billable payload across every trip
    Fuel economy Rolling resistance changes with tire construction and contact patch High-mileage highway fleets usually see the benefit first
    Durability Sidewall height, casing type, and wheel material affect damage resistance Mixed-terrain routes punish low-profile highway specifications quickly
    Brake heat management Wheel material and tire construction affect heat rejection around the wheel end Long descents and tropical heat expose weak combinations early
    Maintenance cost Tread wear patterns reveal inflation, alignment, suspension, and bearing issues A tire replacement bill often starts as a chassis-management problem

    11R22.5 vs 12R22.5 vs 295/80R22.5: Which Tire Profile Fits Your Route?

    The heavy-duty trailer market still revolves around two common naming systems: imperial sizes such as 11R22.5 and 12R22.5, and metric sizes such as 295/80R22.5. The practical difference is not branding. It is ride height, sidewall behavior, and route fit.

    A typical 12R22.5 has a section width around 305 mm and a taller sidewall than a 295/80R22.5 highway tire. That usually means more chassis clearance and a little more tolerance on broken surfaces. A typical 295/80R22.5 package sits lower overall, which helps reduce trailer ride height and center-of-gravity penalty on paved, long-haul work. The narrower 11R22.5 remains common on medium-duty, bus, urban, and legacy applications, but its lower typical load index must be checked carefully. Exact dimensions vary by brand, load index, and tread family, so always confirm with the actual tire data book before final spec.

    Parameter 11R22.5 12R22.5 295/80R22.5
    Typical section width Approx. 279 mm (11.0 in) Approx. 300 to 305 mm (12.0 in) 295 mm (11.6 in)
    Typical overall diameter Approx. 1,050 mm (41.3 in) Approx. 1,085 mm (42.7 in) Approx. 1,020 mm (40.2 in)
    Matching tubeless rim 8.25×22.5 9.00×22.5 8.25×22.5 or 9.00×22.5
    Typical load index 146/143 (single 3,000 / dual 2,725 kg) 152/149 (single 3,550 / dual 3,250 kg) 150/147 to 152/149
    Typical cold inflation 830 kPa (120 psi) 930 kPa (135 psi) 830 to 930 kPa (120 to 135 psi)
    Best route match Standard-load, urban, medium-duty, and legacy applications Mixed terrain, poor roads, quarry access roads, mining support Long-haul asphalt corridors, line-haul reefer, van, tanker, and highway flatbed work
    Main caution Lower load capacity than common 12R22.5 heavy-duty packages Can give away some highway-efficiency advantage versus a lower-profile road tire Less forgiving when the route includes sharp rock, potholes, and repeated edge impacts

    Actual outer diameter can vary by 15 to 20 mm with tread depth and manufacturer tolerance. Never mix 12R22.5 and 295/80R22.5 on the same axle or drive tandem; the diameter difference can affect ABS signals, speedometer readings, effective gearing, and fifth-wheel attitude.

    Radial vs Bias Ply Tires: Efficiency vs Severe-Service Toughness

    The tire profile answers only one part of the question. The other part is construction. Radial tires and bias-ply tires behave differently under heat, load, and sidewall abuse.

    Tire construction Where it usually wins Main strengths Main trade-offs
    Radial Paved, higher-speed, long-haul service Lower rolling resistance, cooler running, more even tread wear, better highway economics Less forgiving in severe rock-cut and low-speed abuse when compared with a true severe-service bias setup
    Bias ply Mining, rough haul roads, severe off-road support Strong sidewall toughness, good resistance to impacts and cuts, stable in harsh low-speed abuse More heat buildup and poorer efficiency on sustained highway duty

    What the Radial Fuel Saving Means in Dollars

    Industry testing commonly places comparable radial designs at 15% to 25% lower rolling resistance than conventional bias-ply tires. Because tire rolling resistance is a material part of total highway road load, a well-managed radial package can support approximately 5% to 10% lower fuel use and 30% to 50% longer tread life than a bias package in sustained paved service.

    For a combination traveling 200,000 km per year at 33 L/100 km with fuel at $1.10 per liter, annual fuel cost is $72,600 USD. A conservative 5% saving equals $3,630 USD per truck per year, which can cover the cost difference of a radial conversion on a high-mileage fleet.

    The rule is simple: radial is usually the default answer for modern highway trailers, but it is not automatically the best answer for every route. When fleets in Africa or South America spend real time on broken haul roads, a tougher bias package can still protect total tire cost better than a highway-optimized radial that keeps failing at the sidewall.

    Workshop Diagnostic: What Trailer Tread Wear Is Trying to Tell You

    A semi-trailer tire should not be treated as an isolated wear part. Many tire failures are actually alignment, inflation, suspension, or bearing faults that first show up in the tread.

    Wear pattern Most likely root cause Workshop action
    Center wear Over-inflation Reset cold inflation pressure to the real load-and-speed requirement, not a generic maximum-sidewall habit
    Shoulder wear on both edges Under-inflation or chronic overloading Verify axle load, inflation practice, and whether the trailer is regularly leaving the yard overloaded
    Cupping or scalloping Worn dampers, loose wheel bearings, or suspension instability Inspect suspension hardware, wheel-end play, and axle-end stability before fitting new tires
    Feathered edge Toe misalignment or axle-tracking error Run a proper axle-alignment check and inspect suspension hanger condition
    Repeated damage on one axle position Localized route strike, brake drag, or chassis issue Compare wheel-end heat, brake release, and axle geometry instead of blaming the tire alone

    Forged Aluminum vs Steel Trailer Wheels

    For fleets comparing wheel materials, the real questions are payload, heat behavior, and service discipline.

    Factor Steel wheel Forged aluminum wheel
    Upfront cost Lower Higher
    Weight Approx. 45 to 48 kg for a 22.5×9.00 wheel Approx. 24 to 25 kg for a comparable forged wheel
    Heat behavior Approx. 50 W/(m K) thermal conductivity Approx. 160 to 200 W/(m K), improving wheel-end heat rejection
    Workshop repair culture Easier for basic-field repair logic in remote workshops Demands cleaner handling, correct torque, and better fitment discipline
    Best fit Rough service, mining support, budget-led standardization Highway fleets chasing payload, fuel, and thermal control

    On a 3-axle trailer and 6×4 tractor combination with 22 wheel positions, switching from full steel to full aluminum wheels can often recover approximately 500 to 550 kg (1,100 to 1,200 lb), depending on the exact wheel and hardware specifications. That recovered weight can be turned into payload where axle law and cargo density allow it.

    Forged Aluminum Wheel ROI Example

    Assume 22 forged aluminum wheels cost an additional $170 each, creating $3,740 USD of upfront investment. With annual fuel savings of $1,100, payload gain of $1,800, and tire/brake wear savings of $300, the payback period is approximately 1.17 years. For long-haul fleets exceeding 150,000 km (93,000 miles) annually, a 12- to 15-month payback is a practical target, subject to local fuel prices and payload rules.

    Critical Conversion Warning

    Do not treat an aluminum-wheel conversion as a simple wheel swap.

    • Check stud length: aluminum-wheel flange thickness often requires longer hub studs for correct thread engagement.
    • Use the right nuts and surfaces: match hardware to the wheel-seat design and keep the mounting faces clean.
    • Enforce re-torque discipline: after initial service, wheels should be re-torqued according to the fleet’s wheel policy and supplier guidance. Do not skip the first follow-up inspection.

    Single, Dual, and Super Single Trailer Tire Layouts

    Wide-base single tires, often called super singles, are now part of many fleet-efficiency discussions because they remove one tire from each wheel end and simplify the contact patch.

    Layout Main advantage Main risk Best-use logic
    Dual tires Redundancy and familiar service practice More weight and more rolling complexity Best for mixed fleets, remote corridors, and operators who value limp-home tolerance
    Super single Lower weight and cleaner rolling package No backup tire if the casing fails on that wheel end Best for disciplined highway fleets that can support TPMS/ATIS and proactive tire management

    On paper, a super-single package can improve payload and rolling efficiency. In practice, the failure mode is harsher. A blowout removes the entire wheel-end support, which is a very different operational problem from losing one tire in a dual set. That risk matters far more in the Australian Outback, cross-border African lanes, or remote mining corridors than it does in dense service networks.

    Recommended Tire and Wheel Combinations by Route Type

    Based on field-use logic and export fleet realities, the best spec is usually the one that matches the route, workshop capability, and business model together.

    Region or route pattern Recommended direction Why it usually works
    Southeast Asia highway work with high heat and humidity 295/80R22.5 radial + forged aluminum wheel package Highway efficiency and better wheel-end heat behavior matter more than rough-road sidewall protection
    Central Asia and Australia long-haul paved corridors 295/80R22.5 radial, with aluminum wheels where payload math justifies it Lower ride height, payload discipline, and long-distance highway economics usually lead the decision
    Africa and South America mixed terrain, quarry access, or mining support 12R22.5 or severe-service bias package + heavy-duty steel wheels Higher sidewall tolerance and easier field-service logic often protect total operating cost better than a pure highway setup
    Remote fleets with weak roadside support Stay conservative: dual tires and steel wheels unless the business case for change is strong Serviceability and failure tolerance can outweigh theoretical efficiency gains

    Do Not Ignore the Brake and Suspension Connection

    Wheel and tire changes affect the rest of the running gear. Lighter wheels reduce unsprung mass, while different tire profiles change ride height and suspension behavior. That means brake response, alignment condition, and suspension health all matter more after a spec change, not less.

    If your fleet is pairing wheel upgrades with highway-brake upgrades, also review the Semi-Trailer Braking Systems Guide: ABS, EBS, RSS and AEBS and the long-downgrade brake-fade guide. The rolling package and the braking package should be treated as one operating system.

    Fleet Workshop Checklist Before You Approve a Tire or Wheel Change

    Check item Why it matters Workshop note
    Actual route profile Spec must match the worst road section, not only the average highway section Break the route into paved, broken, quarry, and mountain segments before ordering
    Axle load and inflation practice Wrong pressure strategy destroys even good tires quickly Use real load data and a cold-pressure policy, not rule-of-thumb inflation
    Hub, stud, and wheel-seat compatibility Essential when moving from steel to aluminum Confirm stud length, nut type, and mounting-face condition before conversion
    Alignment and suspension condition New tires cannot compensate for a bent or unstable chassis Check toe, axle tracking, hanger condition, dampers, and bushings
    Brake-release and wheel-end heat behavior Dragging brakes create tire and heat complaints that look like tire faults Inspect brake balance, chamber release, and wheel-end temperature after road test

    Wheel Fitment, Inflation, and Safety Rules

    1. Control galvanic corrosion: clean aluminum wheel and steel hub mounting faces and follow the wheel supplier’s approved anti-seize procedure in humid or salt-spray service.
    2. Re-torque after initial service: check aluminum wheels after the first 50 to 100 km (30 to 60 miles) using a calibrated torque wrench. Typical 22.5-inch values are often 550 to 600 N m (405 to 440 lb-ft), but the wheel and hub supplier specification always controls.
    3. Maintain cold pressure: running a radial tire 10% under-inflated can increase fuel use by approximately 1.5% and reduce tread life by about 10%. TPMS is strongly recommended for long-haul fleets.
    4. Match tire and rim systems: 22.5-inch tubeless tires require 15-degree drop-center tubeless rims. A 12.00-20 tube-type tire requires a compatible multi-piece lock-ring steel wheel. These systems are not interchangeable.
    5. Do not weld forged aluminum wheels: welding or torch heat can compromise the heat-treated structure. Bent or cracked wheels must be removed from service.

    Frequently Asked Questions

    Which is better for rough roads: 12R22.5 or 295/80R22.5?

    Usually 12R22.5. Its taller sidewall and higher overall package make it a safer choice for mixed terrain, broken shoulders, mining access roads, and routes where rim protection and chassis clearance matter more than low ride height.

    Are radial trailer tires always better than bias tires?

    No. Radials are usually better for paved, higher-speed, long-haul service because they run cooler and more efficiently. Bias tires still make sense where sidewall toughness, cut resistance, and harsh low-speed abuse matter more than highway fuel economy.

    Do forged aluminum wheels really increase payload?

    They can. A full set of aluminum wheels can remove several hundred kilograms of dead weight from a tractor-trailer combination, depending on wheel count and exact spec. But the value only holds if the route is road-focused enough and the fleet manages fitment and re-torque correctly.

    When should a fleet avoid super singles?

    Avoid them when roadside support is weak, routes are remote, and the fleet cannot support TPMS or ATIS. On those routes, the redundancy of dual tires is often more valuable than the theoretical efficiency gain of a wide-base single.

    What tread wear pattern points to alignment instead of inflation?

    Feathering and repeated one-edge wear are stronger alignment warnings. Center wear usually points to over-inflation, while both-shoulder wear usually points to under-inflation or overload.

    Can 295/80R22.5 directly replace 12R22.5 tires?

    Do not mix or swap them without checking the complete running-gear system. The roughly 6.5 cm (2.5 in) diameter difference changes ground clearance, ABS and speedometer signals, effective gearing, and fifth-wheel attitude.

    Can a damaged forged aluminum wheel be repaired by welding?

    No. Welding or torch heat can destroy the wheel’s heat-treated structure and create a catastrophic high-speed failure risk. Bent or cracked forged aluminum wheels must be removed from service.

    Should international buyers use ply rating or load index?

    Prioritize the load/speed index, such as 152/149L. Ply rating is an older comparative convention; modern radial tires use load and speed indices for safety and regulatory checks.

    Reference Standards and Industry Sources

    1. ISO 4223 and the ETRTO Standards Manual for tire and rim terminology, dimensions, inflation, and load guidance.
    2. TRA Year Book standards published by the Tire and Rim Association.
    3. SAE J267, Wheels/Rims – Commercial Vehicles – Test Procedures and Performance Requirements.
    4. GB/T 2977-2016, Commercial Vehicle Tyres Series – Designation, Dimensions, Inflation Pressure and Load Capacity.

    Final Recommendation

    Use 11R22.5 only where the standard-load application and axle rating support it. If your fleet runs mostly paved, higher-speed routes, start from a 295/80R22.5 radial highway package and evaluate whether aluminum wheels improve the payload and heat equation enough to justify the conversion. If the route includes severe broken surfaces, quarry access, or mining support, move toward a 12R22.5 or severe-service bias direction on steel wheels. The correct semi-trailer tire and wheel choice is the one that survives the real route while still protecting fuel, payload, and maintenance cost.

    Need Route-Matched Tire and Wheel Spec Support?

    If you are comparing 11R22.5, 12R22.5, and 295/80R22.5, planning a steel-to-aluminum wheel conversion, or evaluating super singles for a new trailer build, send your route profile, axle load target, wheel-end standard, and workshop constraints. KALES can help you turn that route reality into a practical trailer running-gear specification.

    WhatsApp Us Email Inquiry

  • Semi-Trailer Air Brake Troubleshooting: ABS/EBS, Emergency Valves & Leak Guide

    Semi-Trailer Air Brake Troubleshooting: ABS/EBS, Emergency Valves & Leak Guide

    Technical Support · Published: June 7, 2026 · Updated: June 9, 2026 · Word count: 4260 · Reading time: 24 minutes

    Semi-Trailer Air Brake Troubleshooting: ABS/EBS, Emergency Valves & Leak Guide

    Jason, Lead Engineer at Kales Vehicle

    Reviewed by Jason
    Lead Engineer, Kales Vehicle

    On a semi-trailer, every newton of stopping force is supplied by the tractor through two coupling lines and then stored, amplified, and released by the trailer’s own pneumatics. If the brake chambers cannot hold reserve air, the ABS/EBS controller (5) cannot deliver it fast enough, or the quick release valve cannot dump it cleanly, a fully laden trailer can fail to build – or fail to release – its brakes.

    Quick Answer for Fleets

    • Semi-trailer air brake troubleshooting should start at the red and blue coupling heads, then move inward to the trailer valve (Release Emergency Valve), brake chambers, ABS/EBS controller (5), quick release valve, and brake chambers.
    • The ABS/EBS controller (5) feeds stored air from the brake chambers into the active braking components near the axles; the quick release valve exhausts chamber air locally so the trailer releases without delay.
    • UNECE Regulation No. 13 makes response time, breakaway braking, and stored-air reserve performance mandatory, not optional refinements.
    • The most common trailer-side faults are leaking gladhands, water-contaminated brake chambers, sticking relay or quick release valves, and damaged brake-chamber diaphragms.
    • If a trailer charges slowly, drags after release, or fails a response-time test, inspect the brake chambers, Release Emergency Valve, ABS/EBS controller (5), quick release valve, and condensate drain before replacing chambers at random.

    Critical Safety Protocol & Required Tools

    A fully charged semi-trailer air brake system operates at up to 10 bar (145 psi). Never loosen fittings on a pressurized system. Before beginning any troubleshooting:

    • Chock the wheels: Secure the trailer mechanically, as draining the air will apply the spring brakes.
    • Drain the reservoirs: Pull the manual drain valves (lanyards) on the storage chambers (8) to release all pressure before unbolting any valve.

    Bring the right tools: Do not guess air pressure by the sound of a hiss. You will need:

    • A 0-12 bar (0-175 psi) inline pressure gauge with gladhand adapters.
    • Commercial leak detection spray (more reliable than dish soap).
    • A 24V multimeter or test light (for ABS/EBS power checks).

    How a Semi-Trailer Brake Circuit Actually Works

    Semi-trailer air brake troubleshooting is easier when you think in a fixed chain: tractor supply and protection – coupling heads (2)(3) – Release Emergency Valve (6) – storage brake chambers (8) – ABS/EBS controller (5) – brake chambers (12) – quick release valve (7). Pressure build problems happen upstream in supply and storage; release problems usually happen downstream at the relay, quick release, or chamber side.

    Typical semi-trailer 2S/2M ABS system schematic showing ISO 7638 power supply, service and supply lines, ABS/EBS controller, valves, brake chambers, wheel speed sensor, suspension air bag, and spring brake chamber.
    Fig 1: Typical Semi-Trailer 2S/2M ABS System Schematic
    1. ISO 7638 Power Supply 2. Service Line (Control) 3. Supply Line 4. Stop Light Power (ISO 1185, Optional) 5. ABS/EBS controller 6. Release Emergency Valve 7. Quick release valve 8. Storage brake chambers 9. ABS Speed Sensor 11. Suspension Air Bag 12. Brake chambers
    Note: In this diagram, the ABS/EBS controller already integrates the relay-valve delivery function. Please troubleshoot based on the actual installation of your vehicle model.
    Annotated real photograph of a semi-trailer axle air brake system, identifying the exact locations of the ABS/EBS controller, Release Emergency Valve, quick release valve, brake chamber, and sensor cable.
    Fig 2: Real-World Semi-Trailer Brake Component Location Guide
    Annotated field photo showing where the ABS/EBS controller, Release Emergency Valve, quick release valve, brake chamber, and sensor cable sit on an actual semi-trailer axle group. Use it to match the schematic to the hardware before you start disconnecting lines or replacing valves.

    Unlike a rigid truck, a semi-trailer has no compressor of its own. The trailer braking system is connected to the tractor via two specific coupling heads: one for supply pressure (3) and one for control pressure (2). The red supply line (3) charges the trailer’s brake chambers and keeps the emergency side alive, while the blue control line (2) carries the service-brake signal.

    The Release Emergency Valve (6) acts as the central hub, transmitting the control pressure to the ABS/EBS controller (5). The Release Emergency Valve is equipped with two primary controls: a red operating button to actuate the parking brake, and a black operating button to release the brakes, a function that is automatically triggered when the trailer is uncoupled. Compressed air from the storage brake chambers flows through a non-return valve integrated within the Release Emergency Valve and enters the ABS/EBS controller (5).

    Inside the trailer, supply air fills the storage brake chambers (8). When the driver brakes, the signal reaches the ABS/EBS controller (5), which controls the service brake components of the brake chambers (12). The system utilizes at least two ABS wheel speed sensors (9) to monitor wheel rotation. For maintenance, the pneumatic extension module also features a pressure test port to measure actual braking pressure.

    To apply the parking brake, the operator presses the red button on the Release Emergency Valve. This exhausts the compressed air from the parking brake component of the brake chambers, allowing the internal springs to actuate the wheel brakes. If the service brake is simultaneously used, braking pressure flows through the anti-compounding valve into the parking component. This offsets the spring force in proportion to the service braking force established, ensuring that the two forces do not compound and cause mechanical overload on the wheel ends.

    Component Logic: Standalone Relay Valve vs. Integrated EBS Modulator

    System layout What you will usually find on the trailer What it means for troubleshooting
    Conventional pneumatic ABS trailer Separate relay/emergency valve, quick release valve, chambers, and ABS hardware Follow the air path component by component and test each valve body independently.
    TEBS / EBS trailer with integrated modulator ABS/EBS controller often combines electronic control, pressure modulation, and relay delivery logic Do not search for a separate relay valve if the modulator already performs that job. Confirm the exact hardware layout first.
    Mixed fleet workshop reality Older trailers may use separate valves while newer export builds use integrated controllers Start every diagnosis by identifying the installed modulator or valve assembly from the nameplate and air-line routing.

    The Three Primary Working States of the Trailer Brake System

    To fully understand the troubleshooting process, we must recognize the three direct working states of the system:

    1. Normal Braking (Service Brake State): This is the most direct function we feel. When the brake pedal is pressed, the blue control line (2) sends air. The Release Emergency Valve (6) controls the delivery of air from the storage chambers (8) to the active brake chambers (12), generating braking force. When the pedal is released, the Release Emergency Valve (6) rapidly exhausts the compressed air from the chambers, quickly releasing the brakes.
    2. Charging Process (Feedback Braking State): If a trailer has been parked for a long time and the system has no air pressure, the spring parking brakes are active. When the tractor begins charging the trailer’s storage chambers (8) via the red supply line (3), the Release Emergency Valve (6) enters a safe braking state. In this safety state, the Release Emergency Valve initially sends compressed air directly into the brake chambers. Only when the pressure in the storage chambers (8) rises above 4.5 bar is this safety state released. This feedback braking function ensures the trailer generates braking force while charging, serving as a critical safety protection.
    3. Emergency Disconnect (Automatic Braking State): If the supply line (3) is accidentally damaged or disconnected, the compressed air stored in the trailer’s chambers (8) flows through the Release Emergency Valve (6) directly into the brake chambers (12). This automatically executes braking measures to ensure the vehicle’s safety in an emergency. This is the same principle you observe when the tractor intentionally disconnects the supply line when parking.
    Working state What has pressure What the mechanic should observe
    Charging state Supply line (3), storage chambers (8), release circuit Trailer should progressively come off spring parking force as storage pressure rises. If not, check supply, PREV logic, and trapped parking pressure.
    Service braking state Control line (2), ABS/EBS controller (5), brake chambers (12) Brake application should be even and fast across the axle group. Late build-up points to controller delivery, weak supply, or local leakage.
    Emergency or breakaway state Stored air routed by Release Emergency Valve (6) Trailer must self-brake when the red line is lost. If it does not, stop operation and inspect the emergency valve path immediately.

    Trailer Storage and the UNECE R13 Reserve Rule

    A trailer’s air storage within the brake chamber system is not just a tank. Under UNECE Regulation No. 13 for category O trailers, the trailer must keep braking even if the supply line is interrupted. In practice, that means the brake chambers, protection logic, and Release Emergency Valve must preserve enough usable air to keep the service brake effective after repeated applications.

    Annex 7 defines the reserve by performance, not just by volume: after four full-stroke service applications with no recharging, the system must still be able to apply the brake a fifth time and deliver at least 50% of the prescribed service braking performance. For North American buyers, the FMVSS No. 121 shorthand is different but points to the same engineering logic: the trailer air storage volume must be at least eight times the combined volume of the service brake chambers (12) fed by that source.

    In simple fleet terms, usable reserve depends on three things: storage volume, charge pressure, and air consumed per application. More volume and more usable pressure window give the trailer more stored stops. Higher leakage, chamber over-travel, or repeated full-pressure applications consume the reserve much faster.

    ABS/EBS controller (5) vs. Quick Release Valve: Why Trailer Response Lives or Dies Here

    On a semi-trailer, the ABS/EBS controller (5) and the quick release valve are not optional refinements. They are the components that let the trailer meet legal response-time behaviour.

    What the ABS/EBS controller (5) does

    The ABS/EBS controller (5) converts a relatively small control signal into a large, local flow of stored air from the brake chambers (8) into the active chambers (12). Without it, the trailer would have to wait for chamber fill through a longer and more restrictive air path, which slows actuation and reduces response consistency axle to axle.

    What the quick release valve does

    The quick release valve exhausts chamber air directly to atmosphere near the axle instead of sending that air back through the longer upstream path. This is why a healthy trailer releases cleanly and why a damaged quick release valve often shows up as dragging brakes, slow release, or hot drums/discs after a short road move.

    Why the standards care about speed

    UNECE R13 Annex 6 turns “fast enough” into a real pressure-time requirement. The response-time method uses a nominal 650 kPa input signal, with the reference signal rising linearly from 0 to 650 kPa in 0.2 s plus or minus 0.01 s. The trailer-side actuator pressure then has to build from 65 kPa to 490 kPa within the defined response interval. A sticking ABS/EBS controller (5), weak local supply, leaking chamber feed, or damaged quick release valve is one of the most common reasons a trailer fails this kind of test.

    Coupling Lines, Breakaway Protection, and Why Red-Line Faults Are Critical

    The most safety-critical trailer behaviour is automatic braking on breakaway or supply-line failure. If the red line is lost, the trailer must not simply coast free. The trailer valve (Release Emergency Valve) has to detect supply-line evacuation and trigger the emergency or spring-brake side quickly enough to stop the trailer from running away.

    UNECE R13 clause 5.2.1.18.4 makes that behaviour explicit. When the supply line is evacuated at at least 100 kPa per second, automatic trailer braking must start before supply-line pressure falls to 200 kPa. When the designated control is fully actuated, supply-line pressure must fall to 150 kPa within two seconds. This is the formal basis for why cross-coupled lines, leaking gladhands, or a seized Release Emergency Valve are not small housekeeping issues – they directly compromise breakaway protection.

    Inspection item Requirement or threshold How to read it in the workshop
    Stored-air reserve Fifth application still delivers at least 50% braking performance after four full-stroke applications If the trailer goes soft after repeated applications, suspect insufficient reserve in the brake chambers (8), excessive leakage, or bad protection logic.
    Response signal 0 to 650 kPa in 0.2 s plus or minus 0.01 s Slow trailer response usually points to the ABS/EBS controller (5), feed, contamination, or valve-seat issues rather than a tractor complaint alone.
    Actuator build-up 65 to 490 kPa chamber build in the defined response window If local chamber pressure rises late, inspect ABS/EBS controller (5) delivery and flow path first.
    Breakaway start point Automatic braking begins before supply-line pressure falls to 200 kPa If the trailer does not self-brake on a red-line loss simulation, stop using it until the Release Emergency Valve and supply side are checked.
    Supply-line drop on full actuation Pressure falls to 150 kPa within 2 s Slow evacuation suggests the wrong plumbing behaviour, sticking valve internals, or contamination.
    FMVSS 121 trailer air sizing At least 8 x combined service brake chamber volume North American fleets can use this as a quick sizing check when comparing brake chambers (8) and chamber packages.

    Where Trailer Air Systems Usually Leak

    Start with the system charged and the trailer brake applied. Work from the coupling heads inward and use a soap-bubble test on every suspect point. The loudest hiss is not always the true failure point, because sound can travel along pipe runs and cross-members.

    Leak or fault location Typical symptom Most likely root cause
    Red or blue coupling heads / gladhands Trailer will not charge, or spring brakes will not release Worn seals, crossed couplings, damaged gladhand faces, or hose-end damage
    Brake chambers (8) drain valve or tank shell Pressure falls while parked; water drains heavily; rust flakes appear Worn drain seal, trapped condensate, internal corrosion, or pitted shell
    ABS/EBS controller (5) or quick release valve exhaust Leak at the exhaust port; slow release; hot brakes after release Damaged seat, contamination, aged diaphragm, or sticking spool
    Brake chambers (12) Pressure loss on application; one axle drags or under-brakes Punctured diaphragm, pushrod over-travel, or damaged clamp / housing
    Trailer relay-emergency valve (Release Emergency Valve) No breakaway braking; poor charge behaviour; unstable release logic Corrosion, frozen internals, distorted diaphragm, or supply-side contamination

    Fast Diagnostic Sequence by Symptom

    Field symptom First check Second check / do not assume first
    Trailer charges slowly Gladhands, red/blue line routing, tractor supply pressure Then inspect Release Emergency Valve and storage chamber leakage. Do not start by replacing axle-end hardware.
    Trailer drags after release Quick release exhaust and residual chamber pressure Then inspect ABS/EBS controller return, hose collapse, and slack-adjustment condition.
    One axle runs hot Compare chamber stroke and release timing axle to axle Then inspect S-cam, return springs, and local hose restriction. Do not blame the lining set first.
    Trailer will not move after parking Confirm black release button position and charging pressure Then isolate electrical lockup vs. trapped parking pressure vs. seized mechanical brake hardware.
    Breakaway function fails Stop service and inspect red-line logic immediately Focus on Release Emergency Valve, emergency path, and supply-side evacuation behaviour before routine wear items.

    Mobile Field Checklist

    1. Trailer charges slowly: Check gladhands, red/blue line routing, and tractor supply pressure before moving to the Release Emergency Valve and storage-side leakage.
    2. Trailer drags after release: Check quick release exhaust first, then look for trapped chamber pressure, ABS/EBS controller return issues, or a collapsed hose.
    3. One axle runs hot: Compare chamber stroke and release timing across axles before replacing drums, linings, or other friction parts.
    4. Trailer will not move after parking: Confirm the black release button is in the release position and verify that charging pressure is actually reaching the trailer.
    5. Breakaway function fails: Stop operation and inspect red-line evacuation logic, Release Emergency Valve behavior, and the emergency air path immediately.

    Use this list for phone-side field checks, then return to the full table when you need the second-step diagnostic path.

    Semi-Trailer Air Brake Troubleshooting by Symptom

    Now that we understand the structure, let’s look at actual, common faults in the field. Semi-trailer brake faults generally manifest as air leaks, dragging, or locking up.

    1. Air pressure remains below 0.7 MPa for long periods, or the trailer experiences obvious brake dragging

    How to resolve:

    1. Rule out the tractor: Swap the tractor unit with another one to completely rule out tractor-side air compressor or delivery faults.
    2. Soap bubble test: Use soapy water to pinpoint the leak source. Methodically check and eliminate leaks at gladhand connections, pipe joints, cross-leaking inside brake chambers, emergency relay valve exhaust ports, and ABS valve exhaust ports.
    3. Inspect for water/rust contamination: If the leak persists, check if the trailer valve bodies have water ingress or obvious rust. If this occurs, it indicates poor filtration and drying effects from the tractor’s air line. The internal seals are likely compromised, and you may need to replace the valve body.

    2. Trailer is completely locked up after parking and cannot start/move

    How to resolve:

    1. Isolate the electrical circuit: First, unplug the ABS spiral cable to see if the trailer can start normally. This rules out electrical or ECU-related lockup issues.
    2. Verify tractor supply: Ensure the tractor is in a pumping/charging state. Disconnect the air pipe at the hand control valve and check if the output pressure is normal. The pressure should be high during the charging state.
    3. Check Release Emergency Valve status: Confirm that the parking brake is actually in the released state. The black button on the Release Emergency Valve should be pushed in.
    4. Mechanical inspection: If the air circuit checks out fine with no issues, you must ultimately inspect the axles for internal mechanical faults, such as seized S-cams or broken return springs.

    3. Trailer brakes apply but release slowly

    This is classic quick release valve territory. A blocked exhaust, sticky diaphragm, or contaminated valve seat can keep chamber air trapped after the control signal drops. Also inspect the ABS/EBS controller (5) exhaust behaviour; a relay function that does not return cleanly can mimic a quick release fault.

    4. One axle runs hotter than the others

    Do not assume friction hardware first. Compare chamber stroke, local hose condition, and release timing on that axle. A local ABS/EBS controller (5) or quick release problem can keep one axle partially applied even when the rest of the trailer releases normally.

    Common Misdiagnoses to Avoid

    • Dragging brakes do not automatically mean the quick release valve is bad. A collapsed hose, seized S-cam, or over-stroked chamber can create the same symptom.
    • Low system pressure does not automatically mean the ABS/EBS controller has failed. Start with tractor supply, gladhands, drains, and contamination first.
    • A hot axle does not automatically mean friction parts are undersized. Compare pressure build and exhaust timing before replacing drums, discs, or linings.
    • An ABS or EBS warning lamp does not automatically mean the pneumatic side is healthy or unhealthy. Electrical faults and air faults can overlap but they are not the same diagnosis.
    • Replacing chambers repeatedly without checking upstream wet air usually treats the symptom, not the cause.

    Why Moisture and Contamination Destroy Trailer Valves First

    Many valve failures originate upstream in moisture and contamination brought in from the tractor. Water and oil entering the trailer’s brake chambers (8) corrode seats, seize spools, harden diaphragms, and freeze in cold weather. That is why the condensate drain, clean coupling heads, and routine inspection matter more than many fleets realize.

    If a fleet keeps replacing ABS/EBS controller (5) units and quick release valves without addressing wet air and tank contamination, the new parts will fail the same way again. Clean, dry supply air is the foundation of the entire trailer circuit.

    The Fleet Manager’s Preventative Maintenance (PM) Schedule

    To avoid emergency breakdowns and extend the life of your ABS/EBS controllers and valves, integrate this simple checklist into your fleet’s routine:

    Interval Action Item Why it matters
    Daily / Pre-Trip Pull the reservoir drain valves (lanyards) for 3-5 seconds. Expels overnight condensation before it reaches the ABS/EBS controller. If white or yellow emulsion comes out, the tractor’s air dryer is failing.
    Weekly Inspect red and blue gladhand seals. Worn seals cause slow system charging and can trigger false breakaway braking.
    Monthly Perform a brake application and release timing test. Listen for the crisp exhaust of the quick release valve. Sluggish exhaust means the valve diaphragm is sticking.
    Annually Replace the tractor’s air dryer cartridge. Crucial for trailers: many trailer valve failures are caused by oil and water blow-by from a neglected tractor compressor system.

    What to Send Your Supplier or After-Sales Team

    If you need remote support, the fastest way to avoid guesswork is to send a short but complete fault package:

    • Trailer type, axle count, and whether it uses ABS only or TEBS/EBS.
    • Nameplate photos of the ABS/EBS controller or emergency valve assembly.
    • The exact symptom: slow charging, dragging, full lockup, one hot axle, or failed breakaway test.
    • Whether the issue affects one axle, one side, or the whole trailer.
    • Pressure readings taken at the supply line, control line, reservoir/test port, and chamber side if available.
    • Photos or short video of the plumbing layout, valve exhaust behaviour, and warning lights.

    Sources and Technical Basis

    • UNECE UN Regulation No. 13, Rev.8, Amend.11 – trailer braking performance, response time, and reserve-air requirements.
    • 49 CFR 571.121 (FMVSS No. 121) – trailer reservoir sizing, brake-chamber volume rule, and trailer-side air brake equipment requirements.
    • KALES field inspection practice – soap-bubble leak checks, condensate drain inspection, and trailer-side response diagnostics.

    Frequently Asked Questions

    What is the difference between an ABS/EBS controller (5) and a quick release valve on a semi-trailer?

    The ABS/EBS controller (5) delivers stored air quickly into the brake chambers. The quick release valve dumps chamber air locally so the brakes release quickly. One feeds the chambers; the other exhausts them.

    Why does a trailer charge normally but drag after the driver releases the brake pedal?

    The most common causes are a sticking quick release valve, an ABS/EBS controller (5) that does not return cleanly, or a brake chamber (12) or slack-adjustment problem that keeps one axle partially applied.

    How should I troubleshoot a trailer that will not build pressure?

    Start at the gladhands, hoses, and coupling seals. Then inspect the drain valve on the brake chambers (8), tank condition, Release Emergency Valve, and upstream protection logic. Do not jump straight to chamber replacement unless the leak clearly appears during brake application.

    What does the FMVSS 121 reservoir rule mean in plain terms?

    For trailers, each service reservoir, part of the brake chambers (8) system, must have a total volume of at least eight times the combined volume of the brake chambers (12) it serves. It is a simple way to check that the trailer stores enough usable air for safe braking.

    Why is a leaking red-line coupling more serious than a normal service leak?

    Because the red line is the supply and emergency side. If that path is compromised, the trailer may fail to charge correctly or fail to trigger the automatic braking behaviour required during breakaway or supply-line loss.

    Final Recommendation

    If a trailer will not build pressure, respond on time, or release cleanly, the right troubleshooting order is supply line, Release Emergency Valve, storage chambers, ABS/EBS controller, quick release valve, and brake chamber. For builders and fleet buyers, the engineering lesson is simple: stored-air capacity, emergency protection logic, local delivery, and local exhaust are one system. Underspec or neglect any part of that chain and the trailer will eventually show it under load.

    Get Diagnostic Help for Your Trailer Brake System

    If your trailer is charging slowly, dragging after release, locking after parking, or failing emergency-line behaviour, send the axle configuration, valve nameplate photos, pressure readings, and symptom video. KALES can help you narrow the fault path before you replace high-cost components blindly.

    WhatsApp Us Email Inquiry